Showing posts with label Craft Fail. Show all posts

Sunday, November 4, 2012

Revisit October Project List

I've tried several times to announce a project list for a given month.  Last month I used Pinterest to come up with a project list for October.  Each one of my project lists has something in common - I have never finished one.  It seems that establishing a project list is a death wish for those projects.  So what the heck did I do in October?  Well I did a few things, several of which are not completed:

1.  Tranquil Sea Baby Afghan - I referred to this in my October project list as one of the afghans I needed to finish.  I finished it - and I'm pretty happy with the result, so much so that it's in my Etsy store.
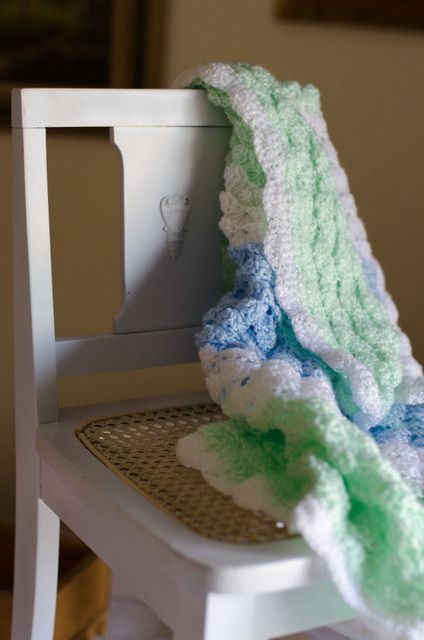

2.  Softest Baby Afghan Ever - I'm bragging now.  I not only finished this afghan, I made another exactly like it - all in October.  The first one was for a friend's baby shower and she loved it.  She also agreed that it was the softest baby afghan ever.  This second one is at Pretty Pretty Cindy.  
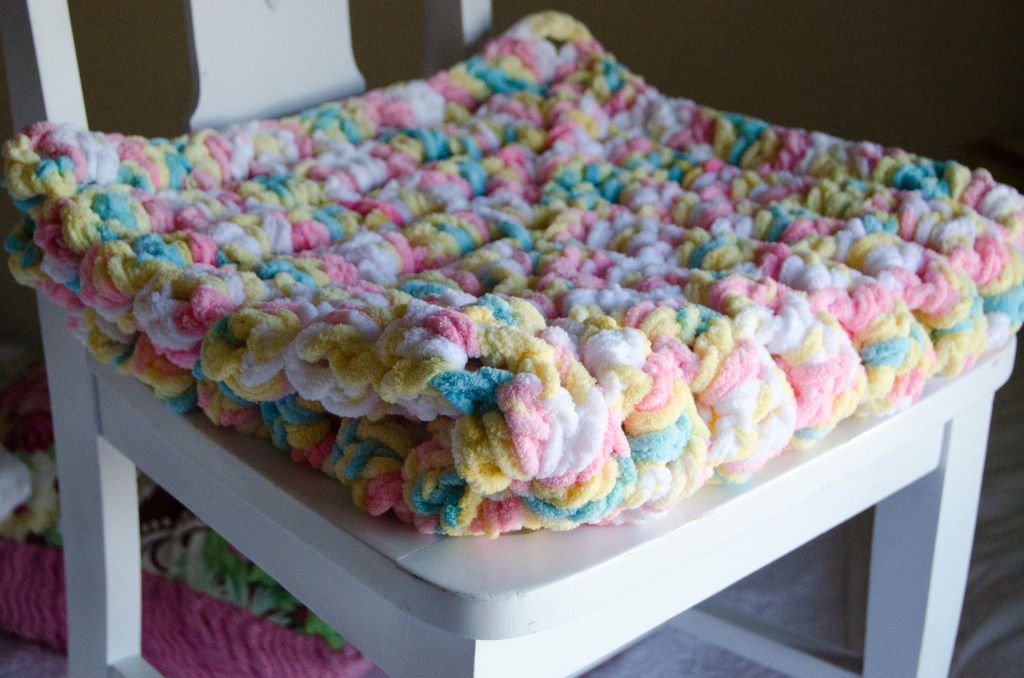


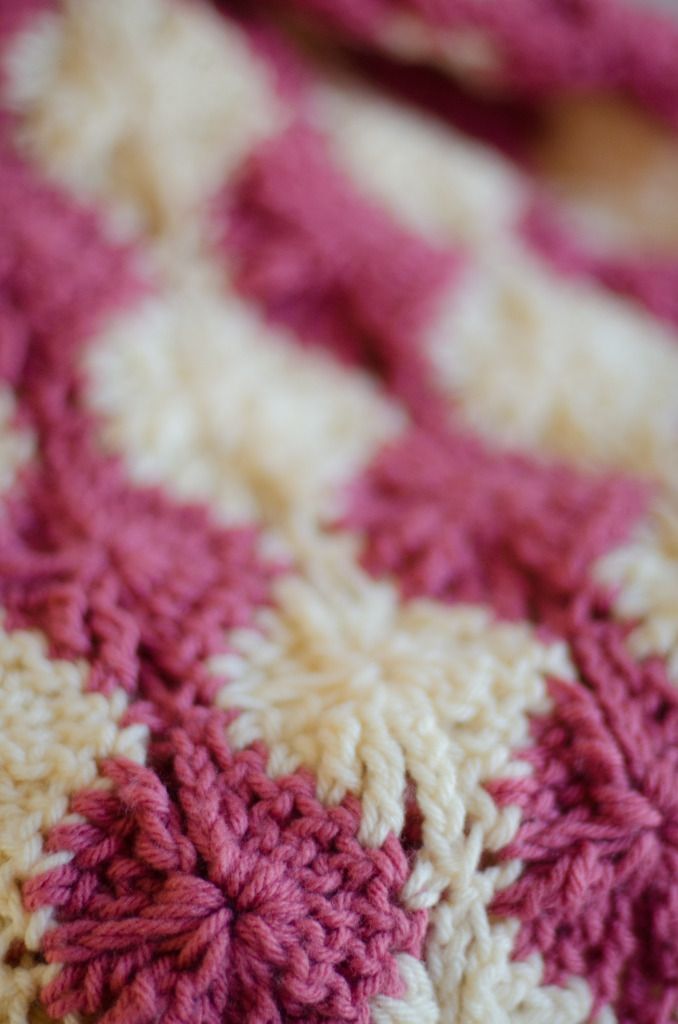
3.  Catherine Wheel Scarf.  I can't show you a picture of this one quite yet because it's out being photographed for my Etsy store.  As the title infers, this scarf is made using a cream yarn in the Catherine Wheel stitch.  I will be showing this one off soon, but if you want to see an example of a Catherine Wheel stitch, check out the most popular item at Pretty Pretty Cindy - Raspberry Sherbet Catherine Wheel Afghan

Now begins the started, but uncompleted items.  Some are really close, but others not so much:

4.  Scrap afghan - this one is sooo easy.  It's just double crochet with scrap yarn.  You change the colors at random.  You tie them together (which you would normally never do).  The extra strings you tie together to get a look like a tied quilt.  This one should be done soon.


5.  Pastel Baby Granny Squares.  This is more scrap yarn.  I love the colors, but haven't quite figured out how I want to put them together.  I am thinking of sashing like you would see in a quilt, but I haven't quite figured out how to do that yet.  Once I do, this project should be done quickly.


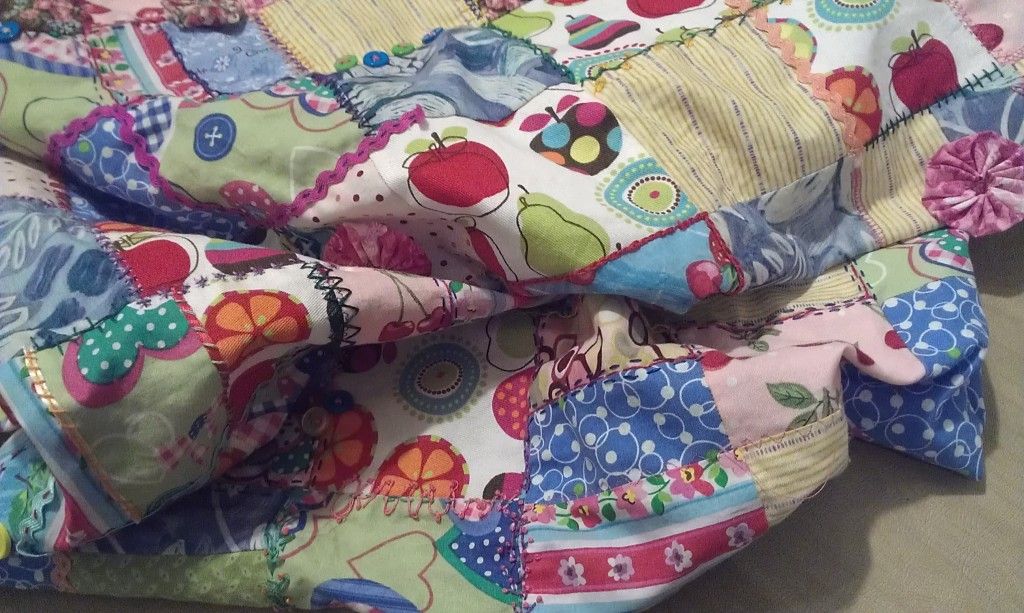
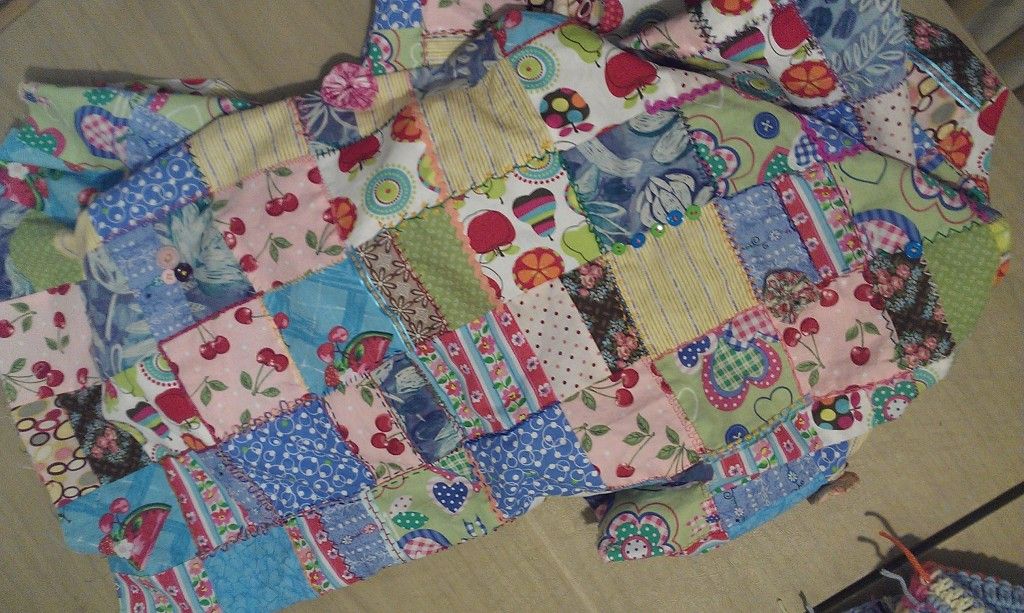
6.  Crazy Crazy Quilt.  I have been working on this for months and I can't decide whether I like it or not.  Either it will be one of those heirloom, one-of-a-kind quilts, or just a hot mess.  I used scraps for the patchwork and hand stitched the embroidery between the squares.  My embroidery is less than rudimentary, so I added some ribbons, ric-rac, buttons and fabric yo-yos randomly.  I better like it by the time I'm done, because I've spent far too many hours at this not to like it.

I'm not sure I want to do a November project list.  I need to start thinking about Christmas - make or buy?  I do think I'm past my crafter's block, but haven't figured out how to get more time to sew.  

Have a good Monday!

cindy


Tuesday, July 3, 2012

Fabulous Fourth of July Shirts

O.K., this is a post I recycled from last year, but considering that hardly anyone read my blog then, I don't feel too bad.  Enjoy!

For the Fourth of July we had some friends over and I had this fabulous idea of making patriotic t-shirts for the whole family - me, Kentster, CJ and Kenzie.  It was such a fabulous idea I stayed up late to make them with brand new t-shirts I purchased - 2 navy blue, 1 red and 1 white.  Briana at Sweet Peas and Bumblebees was the inspiration for the project and I used the awesome digital graphics she suggested from Summertime Designs.  In fact, it was such a great idea that I also found a graphic online to use for Kentster's shirt.

First, you do need to launder the shirts before putting transfers on them.  For the transfer, I used fabric transfer paper from Avery.  They come in different versions for light colored and dark colored fabrics.  That's where I went wrong.  I didn't realize there was a difference and I had some fabric transfers left over from a previous project and I didn't bother to read that they were for light  colors.  Here's what happens when you use the wrong fabric transfer:

The picture can barely be seen.  In fact, the photograph looks better than the real thing.  So make sure you have the right kind of fabric transfer before you get started and make sure to carefully read the directions.

Another point - you need to make sure you reverse the graphic image on your computer before you print it on the transfer paper, otherwise, your shirt will have a backwards transfer which can be very problematic with words.  You also need to make sure when you place the image on the shirt you have it oriented properly, which can be a little confusing when it's backwards.  Here's what happens when you put the image on the wrong way.  The image is not backwards, it's actually upside down!  Ack!!

By this point I had ruined two new t-shirts and had two more I couldn't use because I had dark shirts and fabric transfers for light colors.  I had to improvise.  I managed to find a white shirt for CJ and a gray one for Kenzie in their drawers.  I used the graphic from Summertime Designs and added my own sayings in fonts I liked and voila! they look great!

I really enjoyed taking individual elements of the designs and putting them together!  It made me feel like a graphic designer!  This opens up all types of ideas for making fabric transfers.  You can transfer designs onto shirts, totes, aprons - pretty much any fabric.  You can find designs on the web, including individual pieces you can put together in Photoshop or other similar programs.  We have a Mac and I just put them together in Preview - SO EASY!!  Another idea is to scan scrapbook items - paper, stickers, tags, etc or use photos!  Be sure to honor copyrights where applicable (no reselling).
I know I will be doing more of these types of fabric transfers in the future.  Maybe the next vacation instead of buying the obligatory souvenir t-shirt, why not take a picture or make a scrapbook page to scan and put on a t-shirt.  It will be more meaningful and representative of your trip.  Let me know if you have any other ideas to use with fabric transfers.

A post script to this post - I have never used this technique since last year, but in rereading this post, I am determined to try it again.  In the meantime, my son is going to wear his shirt again this year.

cindy

Saturday, May 12, 2012

Craft Fail and Red Room Reveal

This one has been a long time coming.  It all started several years ago when I found these cute long curtains that fit my son's room perfectly at a garage sale.  At only $3.00, they were something I could cut up without fear.

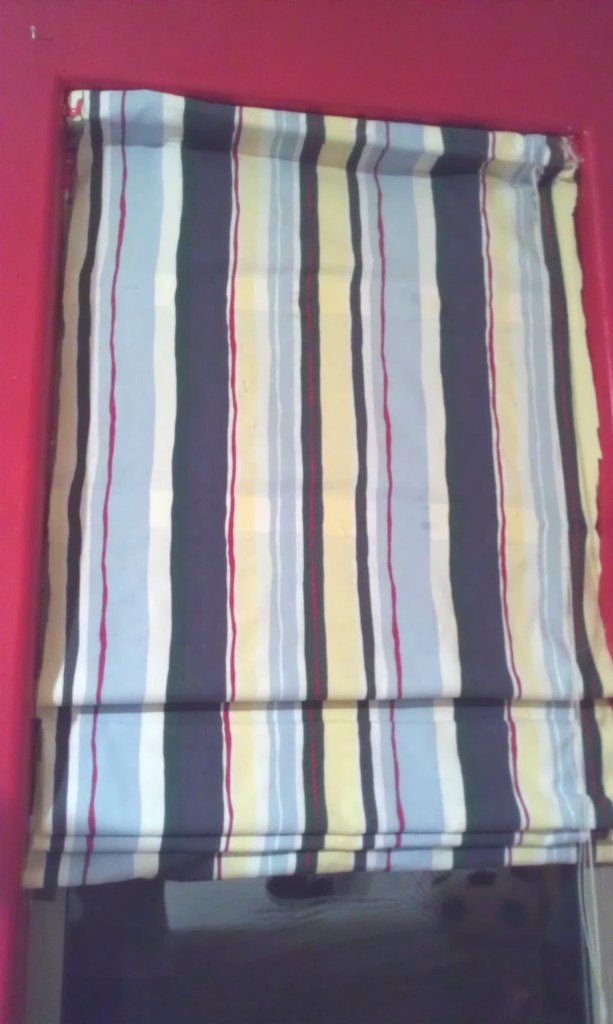
Next I found this amazing DIY for Roman shades, something I've always wanted.  Using the existing wooden blinds, I cut them up, retaining just a few for the shade. I cut the fabric, glued it to the blinds and I was ready to hang. That process took me months, because on some level I was nervous about the whole project.  In addition, my son wanted his room RED, which I agreed to do for one wall only.
After cursing my way through the painting (the reveal coming soon), I hung my fabulous shade


Ugggh!  Where to begin? The width was too wide and the "shades" didn't work.  This is about as good as I could get it positioned.  I worked so hard, but just didn't have the heart to take it down.  So I didn't.  For months.  Meanwhile, the other window had nothing on it for the same amount of time.  (Don't worry, the room opens to the backyard, so there was no problems with anyone seeing inside.)

Finally, about a month ago I decided I needed to correct finish the job.  I took the other matching curtain and tried to make it "look" like the other by sewing in pockets.  Once again, lots of work, horrible results.  This time I didn't even have the heart to take a picture of it.  I ripped them down and the nightmare experiment crashed and burned ended.

As an alternative, I thought I wanted to have straight long curtains.  Again, I was so proud, because I found some solid navy blue and solid red sailcloth curtains at Target for about $3.50 each (big sale).  My plan was to cut them up and sew the blue and red together in bands of color on the panels.  Good plan.  I bought them and got home to find I didn't have enough length for two panels on each window.  I ended up making a long panel for each window and swag it on one side.


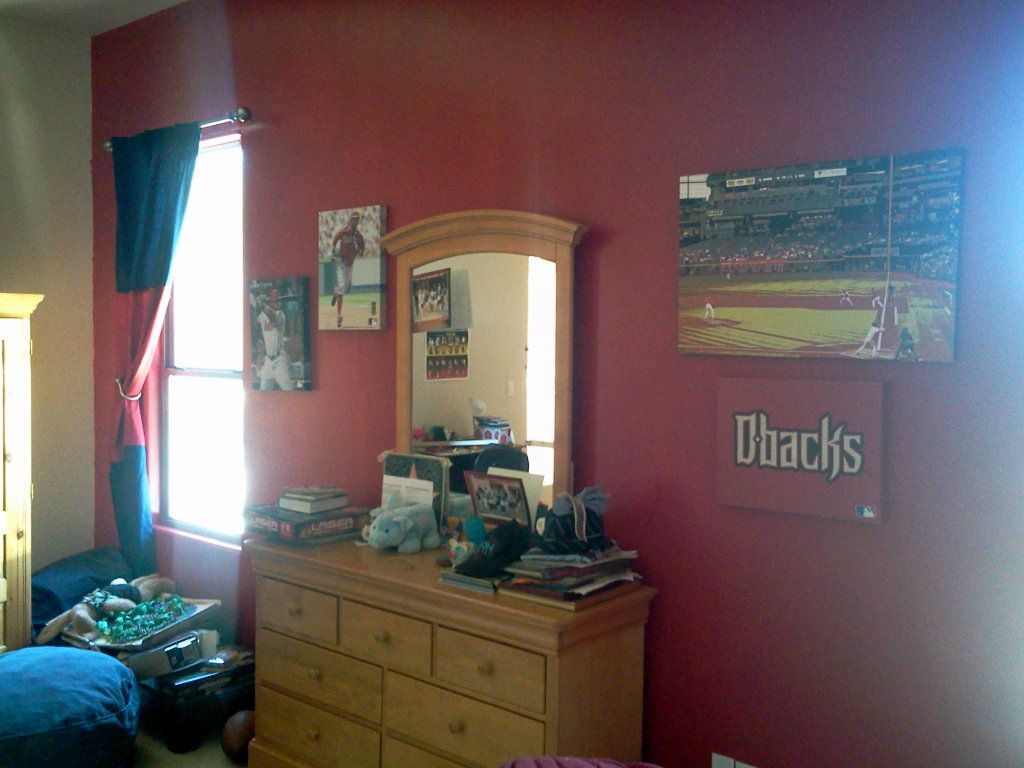
I hung the Diamondback canvas art I bought at Target and a garage sale (all for great prices) and FINALLY the red wall is done!  It's not perfect, but I am so relieved to have it done!

cindy

Thursday, July 21, 2011

DIY - Holiday (or Anytime) T-Shirts

For the Fourth of July we had some friends over and I had this fabulous idea of making patriotic t-shirts for the whole family - me, Kentster, CJ and Kenzie.  It was such a fabulous idea I stayed up late on the 3rd to make them with brand new t-shirts I purchased - 2 navy blue, 1 red and 1 white.  Briana at Sweet Peas and Bumblebees was the inspiration for the project and I used the awesome digital graphics she suggested from Summertime Designs.  In fact, it was such a great idea that I also found a graphic online to use for Kentster's shirt.

First, you do need to launder the shirts before putting transfers on them.  For the transfer, I used fabric transfer paper from Avery.  They come in different versions for light colored and dark colored fabrics.  That's where I went wrong.  I didn't realize there was a difference and I had some fabric transfers left over from a previous project and I didn't bother to read that they were for light  colors.  Here's what happens when you use the wrong fabric transfer:

The picture can barely be seen.  In fact, the photograph looks better than the real thing.  So make sure you have the right kind of fabric transfer before you get started and make sure to carefully read the directions.

Another point - you need to make sure you reverse the graphic image on your computer before you print it on the transfer paper, otherwise, your shirt will have a backwards transfer which can be very problematic with words.  You also need to make sure when you place the image on the shirt you have it oriented properly, which can be a little confusing when it's backwards.  Here's what happens when you put the image on the wrong way.  The image is not backwards, it's actually upside down!  Ack!!

By this point I had ruined two new t-shirts and had two more I couldn't use because I had dark shirts and fabric transfers for light colors.  I had to improvise.  I managed to find a white shirt for CJ and a gray one for Kenzie in their drawers.  I used the graphic from Summertime Designs and added my own sayings in fonts I liked and voila! they look great!

I really enjoyed taking individual elements of the designs and putting them together!  It made me feel like a graphic designer!  This opens up all types of ideas for making fabric transfers.  You can transfer designs onto shirts, totes, aprons - pretty much any fabric.  You can find designs on the web, including individual pieces you can put together in Photoshop or other similar programs.  We have a Mac and I just put them together in Preview - SO EASY!!  Another idea is to scan scrapbook items - paper, stickers, tags, etc or use photos!  Be sure to honor copyrights where applicable (no reselling).
I know I will be doing more of these types of fabric transfers in the future.  Maybe the next vacation instead of buying the obligatory souvenir t-shirt, why not take a picture or make a scrapbook page to scan and put on a t-shirt.  It will be more meaningful and representative of your trip.  Let me know if you have any other ideas to use with fabric transfers.

cindy

Monday, July 11, 2011

DIY - Glitter Nails [FAIL]

Today I feature a "craft fail" and it's not the first (or last) one.  I tried the "glitter nails/toes" with Kenzie - she got the nails, I got the toes.  Pretty simple - red nail polish, glitter on top while wet and a clear coat after the red paint with glitter dries.  It was a great idea I found on a blog (the source of all creativity), but I managed to mess it up.  The problem is the glitter - I realized the suggestion to use a special fine glitter wasn't just a suggestion.  Now the pedicure on my big toe is scratching my leg whenever the nail touches it.  If that's not bad enough, now you get to see my ugly feet:


Kenzie's fingernails were cute, but I'm worried she may wake up tomorrow with scratches on her face from the glitter.  (Notice how she made her fingers into a cute heart :)


Lesson learned: If you want the project to turn out EXACTLY the way you expect, follow the directions.  If you want to be creative, use the directions as a suggestion, but be prepared for the consequences - good, bad or ugly.

cindy