Showing posts with label Crafts. Show all posts

Thursday, May 28, 2020

DIY Day Camps During Pandemic


Anyone with a child at home under the age of 18 is experiencing some level of stress as summer stretches out before us in a world dealing with the COVID-19 epidemic. This is NOT a post to debate the issues of whether or not to venture out for organized activities or camps. If you want that local (Arizona) debate, there is a great post from Raising Arizona Kids.

However, if you have decided to create your own "at-home" experience, here are some resources that might help you. The key point is plan, plan, plan! If your kids are at camp, whether sleep camp or day camp, their schedules are tightly controlled. To create your DIY camp, I would suggest doing the same. My second suggestion is to make these activities feel "different." You've been home with the kids for some time now and to get everyone in the "camp" mood, this needs to feel special or different. Of course, you can always pick and choose fun activities from this list. So, let's create your own DIY summer camp with step-by-step instructions!

1. Create a name for your camp. Many years ago, I entertained my (now adult) niece and nephew at Camp Campbell.  One of our first "arts and crafts" activities was making a camp shirt.  Here's a link for an easy way to make tie-dye shirts with acrylic paint. It would be very easy to create some stencils with your "camp" name and paint them on after your tie-dye shirts are done. You just created 2 days of arts and crafts activities and a memento of their camping experience!


2. Plan your "camp" meals. If you want to keep it easy in a "day camp" setting, you just need to plan fun lunches that you can eat picnic style. I've packed a ton of ideas onto a special Pinterest board, Day Camp so you should have no problem planning ahead. If you really want to be adventurous and include a "sleep-over" camp with a fire, don't forget to include the s'mores and at least one "campfire" meal.  I've also included some links on the Day Camp Pinterest board for that.

3. Keep a strict schedule. Be sure to plan educational activities, physical activities, arts & crafts and quiet time into your camp, keeping in mind the ages of your campers. See the list of links below as well as my Pinterest Day Camp page for specific ideas on each type of activity. Consider creating a schedule board for each day, or a handout for the "campers" so they know exactly what is coming.

4. Consider at least one overnight camp out in the yard. This could include a tent and campfire, or as simple as some blankets and sleeping bags in the living room. 

5. Get some "camp counselors." If you have older kids, get them involved! Younger kids will be thrilled, you give those older kids something to do, and take some of the pressure as "camp director" off of you!

6. Have a specific "start" and "stop" to camp, especially if you are doing a "day camp" format. It's not sustainable to keep "camp" going indefinitely and kids will likely lose interest if you try. Keeping a "start" and "stop" is almost as important as keeping a strict schedule because it gives kids the feeling of something "different".  You also get time off when camp is not in session!

Can't bear to do this alone at home?  Here are some resources to local virtual day camps this summer. 

Ideas for Educational Activities
  • Phoenix Water Services has a brand new digital resources pages. The left side is for kids and the right is for adults. Don't miss the fun videos of "Wayne Drop" and "Loo Poo".  There are activity books with coloring pages you can print for the little ones or order free hard copies in advance. Be sure to check out the tons of lesson plans you can use.

  • Virtual Water Festival is another page from Arizona Project WET and geared to teaching elementary students (especially 4th grade) about water. Filled with videos, lessons and games, this is a treasure trove.
  • STEM Lessons Activities from Nerding teaches how to build or do a bunch of fun things, especially for elementary and middle schoolers.
  • Mystery Science has a ton of activities for kids, Kindergarten through Middle School
  • Make a Time Capsule What better time than now??
  • Make homemade cards and send a letter to relatives (just like at camp!)
  • Grow Borax Crystals
  • Make Elephant Toothpaste with a few household items. Cool science experiment - outside.
  • Make up stories, create your own book and illustrate (this can be done over several days)

Ideas for Physical Activities
  • Play at Home - This is a great, interactive and local website that includes mindfulness, songs and a little yoga. It's especially great for preschoolers.
  • Children's Museum of Phoenix has a bunch of videos with movement and yoga, as well as other videos with projects and learning.
  • Swimming - Don't have a pool? Create a slip & slide with the hose, bubbles and/or shaving cream. Hose them down when you're done. See a bunch of DIY slip & slides on Pinterest
  • Biking
  • Scavenger Hunt, Obstacle Course or Relay Game - see my Day Camp board on Pinterest for tons of outside games you can put together for a relay
  • Paint with Squirt Guns - Arts & crafts and physical activity in one!
  • Make bubbles - see Pinterest for a recipe for giant bubbles

Ideas for Arts & Crafts
  • As You Wish Pottery has complete kits you can pick up or they can ship to you!
  • STG Top 5 Kids Crafts - our very own!
  • Cake decorating. This is fun whether you have a lot of supplies for decorating or just a few. Each kid gets to make their own cake and then decorate it.


Ideas for Quiet Time
Whatever you decide to do this summer, take some time to relax. It's been a hard couple of months for everyone and you deserve it!

cindy


Saturday, April 1, 2017

Art for the Soul

*This is not a paid endorsement of Valinda Martin's Art for the Soul, but a post about my own experiences while visiting this store.  I was not compensated in any way and the opinions are purely my own.*

Last weekend while visiting Southern California, I strolled the streets of Balboa Island near Laguna Beach.  If you have never been to Balboa Island, you must take a couple of hours to visit this adorable little place of summer beach homes and eclectic shops.  There are little clothing stores, local food and best of all, gift shops.  I consider myself a creative person, but walking through these shops puts my creative thoughts into overdrive.  I don't normally write posts about stores, but I can't describe all the cool stuff I saw in this one little shop without mentioning it - Valinda Martin's Art for the Soul Gallery & Gifts.  According to the employees, Valinda finds independent artists from around the country and gathers their unique gifts in her little shop.


I wanted to make everything in the store.  The creativity was oozing out of the walls in this store, and instead of trying to describe some of the amazing art, I took the liberty of taking some pictures.


This was the display just inside the door.  Valinda found an artist from Arizona who recycled license plates and makes plaques from the individually cut letters and numbers.


There were several of these little "woodies" and some 60's style VW buses around the store.  They open to reveal a small chest that can be used as a beer/soda cooler.


There is an entire wall devoted to shiny ceramic pendulum clocks.  Look at the quirky designs!  I wanted to take everything home!


Here is a wall of sheet metal sayings.  I loved the way everything was displayed on bright yellow walls.  The bright cheery vibe kept my interest (until my 15-year old son dragged me out).


Finally, I found a wall of wooden plaques made by a North Carolina artist.  While I'm not sure how these were made, it looks like a paper background was made from little pieces of different kinds of paper "modge-podged" into a single sheet that was then copied.  The artist then drew directly onto the paper and the entire thing was again copied (probably for more mass production).  It was really cool.

I'm just scratching the surface of all the treasures in this quirky little store.  (I didn't think it was too polite to stand around taking pictures of everything.)  I will definitely go back again and maybe try out a few ideas I saw in this shop and several others.  If you do get to Balboa Island or their other store in Laguna Beach, stop by and enjoy the creativity on display.

cindy


Saturday, December 31, 2016

It's Just Another New Year's Eve ...

... and my husband is playing Barry Manilow on piano.  That seems to be one of our New Year's Eve traditions.

Many New Year's Eve traditions revolve around food.  We don't really do it every year, but in my family that means black-eyed peas.  In another tradition we developed with some old friends, it also means Scotch Eggs (Heart Attacks) in the morning.

This year I'm looking forward to being home together.  Someone has been in Rome in the last 2 years.  We won't have a big party, just the four of us eating junk food and watching a little television, maybe a movie.  At midnight it will be silly hats and noise makers.  It's not much, but it's what we do.

It's also time to make resolutions.  At my age I've seen too many resolutions come and go, mostly resolving to being healthier, exercising more and losing weight.  Yeah, sure, those apply again this year so I'll give them a cursory nod. 

This year I resolve to make time for the things I love to do.  Mostly that means sewing and crafting for my Etsy store.  With my busy schedule, I have to made the effort to doing in small doses.  Crochet is good for that and I can break up sewing projects into small tasks (cutting fabric, sewing a couple of things at a time or stuffing a nursing pillow).  I also want to be a little more consistent blogging now that I have a dedicated Surface Pro that I don't have to share with anyone else. [big smile on my face right now.]

Let's see what 2017 brings.  Happy New Year!

cindy

Sunday, July 31, 2016

15 DIY Craft Projects for the College Student

OK, you're off to college, but you want to incorporate something in your new life that reflects your crafty side.  Here are 25 of the best and useful projects you can make before you leave or bond with some new friends on a craft project!  You can see these and more on my Pinterest boards, College and Dorm DIY

Desk Organization Projects

1.  Desk Organization Set - This three little bulletin board set works well above your desk and I have to admit I'm a little partial because it's my DIY.
2.  Desk Supplies Organizer - No link, just a picture.  Use a shoebox and cardboard toliet paper rolls. So easy and cute - great if you have a lot of pencils/pens


3. Frame jewelry/picture hanger - From the UK, Love Chic Living describes this as a way to make an easy photo collage.  I think it's cute as that, but would also be a great way to hang your jewelry, especially if you added a little background cork for earrings.  You can find the little "clothes pins" at Michaels.
4.  Desk Organizer - This is a cute little video tutorial on making a desk organizer with scrapbook paper and little boxes.  You can find little boxes at craft stores or the dollar stores.


5.  Faux Book Cellphone Charging Station I had to include a picture on this one.  It might be nice if you are nervous about leaving your phone out in the open.


6.   Shoebox Charging Station - I really liked this one because (A) it's easy; and (B) it's functional.  One thing I would note - you should probably leave the lid of the box open when you are charging your items so it doesn't overheat and be sure to unplug fully charged devices (your manufacturer's instructions for your electronics will tell you that part too).
7.  Frame organization/note board/calendar - There are a ton of variations of this project, but the concept is pretty simple - picture frame, paper/fabric background in frame and dry erase pen to use on the glass.  
8.  Mason Jar Desk organizer - Mason jars on their sides glued together.
9.  Tennis Ball Friends - I think these are functional and super cute.


Storage Solutions

10. Storage Crate Ottoman -This is the cutest design from The Eager Teacher.  These would be ideal tucked under your bed for storage and brought out when you have extra guests or need a foot rest.  Two notes - make sure the store bought crates will support your weight and consider a fabric loop/tab to stick out on the side of the cushion so you can easily access the storage space in the crate.
11.  Mason Jar Bathroom Storage  In this tutorial you paint Mason Jars for a really cute look.
12.  Washi Tape Color Coded Plugs - Just a picture, but pretty self-explanatory

13.  Bedside Pocket Organizer - This is a must in a dorm room. Easy to keep stuff right on your bed.
14.  DIY Frame Key Holder Easy, cute and very functional
15.  Makeup Brush Holder - There are a bunch of little DIY projects with a fun presentation.

Saturday, August 29, 2015

Tie Dye with Acryllics

I've been collecting a lot of pins on Pinterest and haven't had a chance to try all of those cool crafts. My extended family met at Kentucky Lake over the 4th of July, and never missing a chance to try a craft, my very own Craft Diva and I tried out this tie dye method from Ricochet and Away!  I found it to be easier than most dyeing methods I have seen and it's something kids can easily do.  However, I would not expect to wear the finished product for at least 24 hours due to drying (and possible need for re-dyeing.) I found everything I needed for this craft at Walmart:

White cotton shirts
Acryllic Paint (I used Waverly Inspirations Chalk Paint in Ocean, Peacock and Pool)
Plastic spray bottles (one for each color)
Package of rubber bands (office supply section)
Plastic gloves (acryllic will come off your hands, but the scrubbing is a pain)


I started with damp shirts and instead of rolling them the way described in the tutorial, I wadded them up into a ball.


This, my friends, is the wrong way.  I had to repeat the painting process more than once because I didn't roll the shirt, but wadded it up into a ball.

Next, combine the paint with some water in the spray bottle.  I used about 70/30 water to paint ratio, but you have to try for yourself.  Too much paint will result in a stiff mess.  Now spray.  We alternated these complimentary colors for the best effect.


After spaying them thoroughly, I put each shirt into a plastic shopping bag and squished them to get the paint distributed.  It didn't work as well as I wanted, because as I said, I wadded up the shirts the wrong way to start.  After removing the rubber bands and seeing big blank white spaces, I realized my mistake and had to roll the shirt up again for another round of spraying.


Once you get the desired amount of paint on the shirts, you need to let them dry completely before wearing (or you will wear the paint).  I also wanted to make sure my shirts didn't accidentally run in the laundry, so before I washed them, I soaked them in cold water and vinegar for an hour.  (It's probably not necessary, but it's the best way to set dye of any kind.)

I made shirts for all of the cousins, but here's the one that turned out best from my grand-nephew.


Awesomesauce!

cindy


Wednesday, August 26, 2015

STG Top 5 Kid Crafts

Creativity in kids should always have an outlet and my daughter is the original Craft Diva. Unfortunately, as she gets older, she's less interested in crafting although she is still really creative. Today I'm reliving the best Craft Diva crafts for kids.  These are easy to do and your kids will be proud of the results. Click on the title to see the original post with detailed instructions.

1.  Origami Ninja Stars - This has to be one of the most popular posts I ever wrote.  This is a craft Kenzie found on her own and her instructions are very simple because we managed to take some good pictures.  Use multicolored copier weight paper for the best results.


2.  Corn Syrup Painting - This is definitely one of my favorites.  You need to use a heavy sketch book paper for this one because the "paint" is heavy and thick.  You will love the shiny smooth effect you get using the paint, but don't forget - it needs lots of time to dry!


3.  Yarn Mache Bowls - These are messy, but even the youngest kids can do this craft (once you make the paste).  This is a great way to get rid of yarn stashes and your child will like having a functional bowl for small items.


4.  Tie Dye with Acrylic Paint - This is an easy tie-dye you can do with acrylic paints.  Great instructions that are easy to do, even with small kids.  It especially works well as an outdoor craft to avoid messy clean up.


5.  Melted Crayon Drawing - We saw this craft many times before we did it, so it wasn't too hard to do.  We were going with a slightly sophisticated product with a black canvas and black paper wrapped crayons from Michaels.  It's a little tricky to do it in a circular pattern like we did, so you might want to stick to the horizontal version.  Also, be careful with those hot glue guns, hair dryers and melted wax crayons with little ones.


So that's it!  While I've been writing this, my now-12-year-old Craft Diva noticed the post and commented that she wants to do more crafting.  We'll see, but if she does, you will see it right here.

Keep those kids crafty!

cindy

Thursday, October 31, 2013

Making Loveys

I've been in a blanket mood recently.  I wanted to try something I've seen online, but was a little nervous about trying it full size.  Solution?  Loveys!


A lovey (or blankie) is a small blanket perfect for babies and toddlers to sleep with, cuddle, drag around and refuse to let go in time for kindergarten.  I made these with cotton fabric on one side with minky on the other, all surrounded by a contrasting ruffle.

They were easy to make.  Decide on the size of lovey you want to make.  There is no uniform size for a lovey.  Mine are 18" x 21".  I wanted the lovey to fit a number of purposes - a doll or infant blanket, a small pet blanket or (mostly) a lovey to love.  I cut the two middle pieces 18 1/2" x 15" - one in cotton and one in minky.  


I wanted my ruffles to be about 2" wide finished, so I cut the contrasting fabric in two strips, each 5" wide x 36" long.  Those measurements assume 1/2" seams and 4" extra length for the ruffle.  


I hate taking pictures while I'm sewing, so while I describe the (easy) process, I'll intersperse the beautiful pictures taken by my friend Kate Eschbach (of Kate Eschbach Photography).


I began with the fun part - the ruffles.  I am estranged from my ruffler attachment and I did attempt a reconciliation for this project, but it just was not to be.  That left me with the old fashioned way.  First, sew the ends of the two strips together to form one long strip.  Fold in half and iron.


Using the longest stitch on your machine, sew long raw edges together with a 1/2" or less seam, leaving extra length of thread hanging after you cut it.  I would not recommend trying to ruffle the entire length at once - your thread will break (several times).  I only did about 12" or less at a time because I'm a ruffle weenie.  I also would go back after each section and sew the ruffles down with a normal length stitch instead of waiting until I ruffled the whole thing.  That doesn't leave a lot of room to adjust before you sew it to the main pieces, but as I said, I'm a ruffle weenie.


Once the long nightmare ruffle is done, take the 3 pieces - cotton rectangle, minky rectangle and long ruffle and make a sandwich lining up the edges - cotton rectangle, right side facing DOWN; ruffle with raw edge matching raw edges of the rectangles in the middle; and on the bottom, the minty with right side facing UP.  Sew a 1/2" (or deeper) seam, catching all three.  Sew all the way around the blanket. Be generous in gathering ruffles at the corners so you don't have to go tight around them.  Leave the last 4-5" on the side open so you can turn it inside out.


Turn the blanket inside out and hand-sew the remaining opening closed.  After I turned the blanket right side out, I went back and removes some of the visible extra threads on the finished product from the places where I initially sewed the ruffles.


And there you have it - easy, right?  (If this looks a little different than the other pictures, this is a second lovey I made.)  You can find both of these lovies for sale in my Etsy store, Pretty Pretty Cindy

You can't have too many loveys.

Monday, August 19, 2013

Kenzie Does Crafts - DIY Finger Paints

Kenzie found this "recipe" on About.com.  We tried it out and have some "comments" of our own.

You  need 2 cups of flour and 2 teaspoons of salt in a mixing bowl.


Pour 2 1/2 cups of cold water in and mix THOROUGHLY.  It will take a while, but you need to get the clumps out.  Mix until smooth.


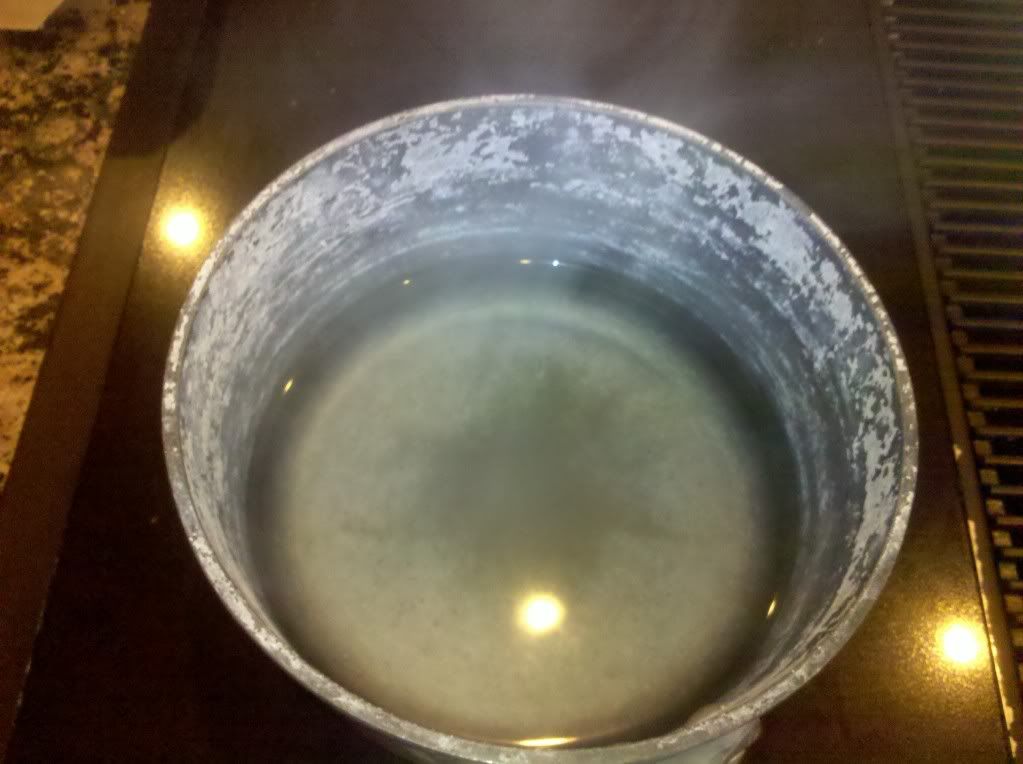
 Boil 2 cups of water in pan


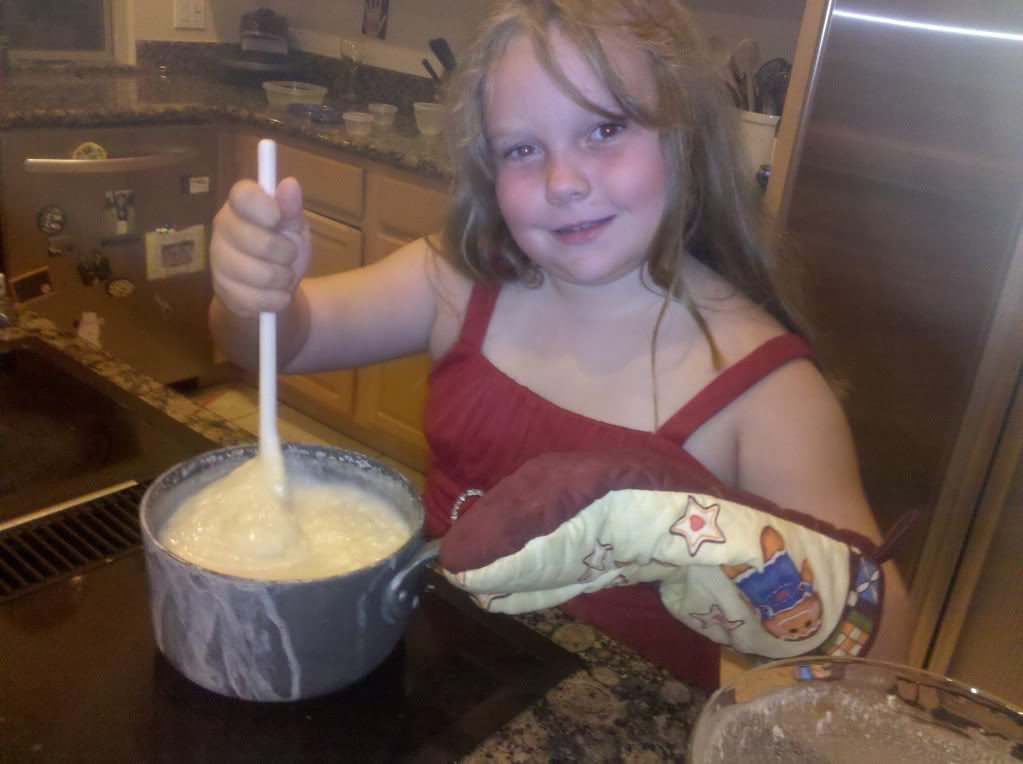
Pour the flour mixture SLOWLY into the boiling water (so it doesn't clump).  Stir constantly over medium heat until the mixture becomes thick (like Cream-o-Wheat).  (It might take a little while)


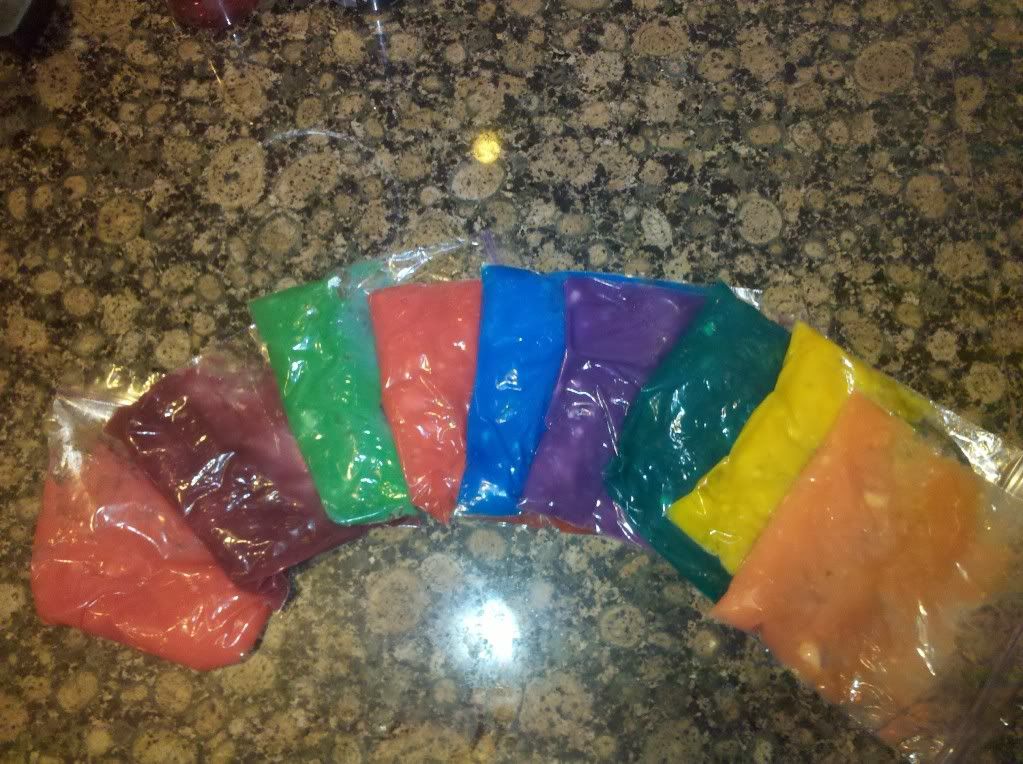
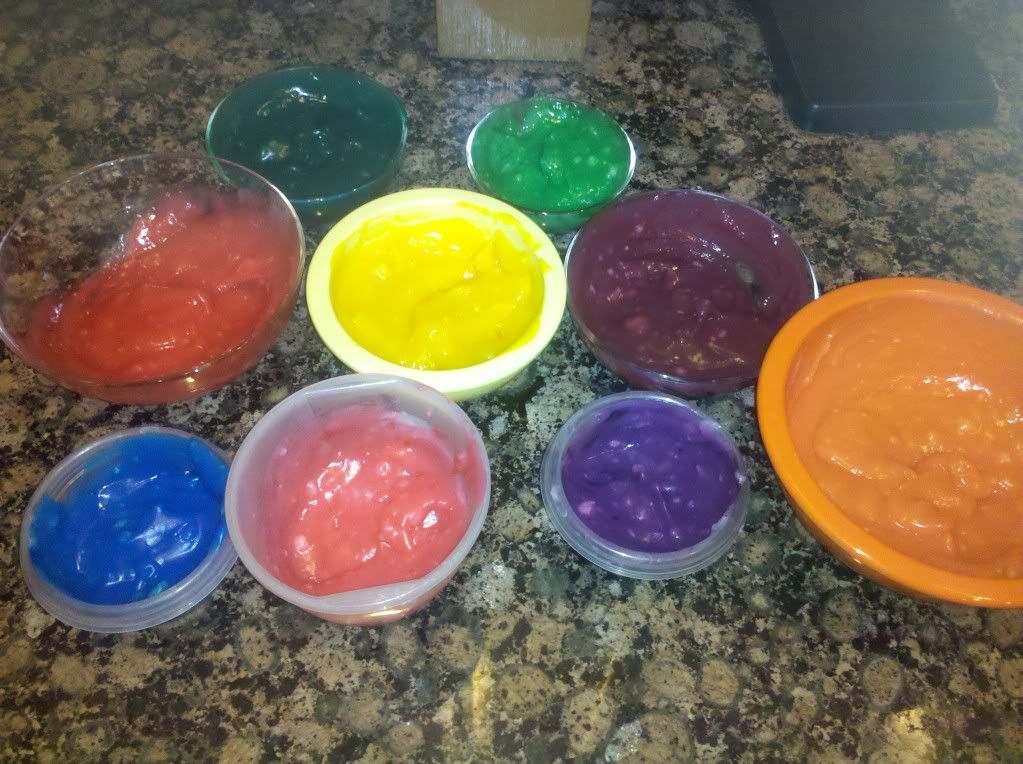
Pour the mixture into multiple containers.  Glass works best because the mixture is so hot.  You will have enough to make A LOT of paint.  Use food coloring, but use very little.  If your package describes how much to use for dyeing eggs, use half that amount.  We probably used too much.  The colors were vivid, but I was a little concerned about getting the dye thoroughly mixed.


I didn't have lids to all of these containers, so I spooned each color into a Ziploc bag.  That actually works very well because you can squeeze out only as much as your little artist needs.  Make sure, however, that you wait until these paints are completely cooled, because I may have put ours in too soon.  The bags didn't melt, but there is a bit of a "chemical" smell on the bags after one day.


One word of caution - these finger paints are food based (flour, salt and food coloring) which makes them great for even little ones.  However, food coloring can stain.  Also, and most importantly, because these are food based, they will "spoil" in less than a week.  Don't keep them too long because we learned the hard way - they will STINK.

Have fun painting!

cindy

Monday, July 29, 2013

Kenzie Does Crafts - Watercolor Stained Glass

During our recent trip, Mackenzie did manage to do a couple of crafts.  This one is sooooo easy and great for little kids too.  You need:  blue painter's tape, heavy (watercolor) paper, watercolor paints (you could even use finger paints).  That's it.

Do this with the painter's tape:


Do this with the watercolors:


Do this with the painter's tape:


You get this:


If you would rather have the "black" window look, use a black crayon and a straight ruler to outline each watercolor design, then color or paint in the black.

I said it was easy, right?

cindy
Monday, July 22, 2013
Kenzie Does Crafts - Corn Syrup Painting

Even on our recent road trip, Kenzie does crafts!  I loved doing this one too.  It's really cool and as long as you keep it neat, you will love the result.  We even did it in the RV!  Here's what you need:

Paper (either heavy stock or glossy paper works great too)
Crayons
Karo Corn Syrup
Food Colors
Paint brushes


Draw your picture with crayons.  It's best to draw things without too much detail.


For each color paint, pour a small amount of corn syrup into a plastic cup - a couple of tablespoons should be fine.

Add a few drops of food coloring.  This is something you need to play with for the right color, however you need only a few drops, otherwise you will get black.

Using your brush, paint within the crayon lines.  This will keep the "paint" contained, because it can be a bit thick.

Once your painting is done, you need to let it dry completely.  It takes a long time - sometimes a few days.  When it is dry, it should feel smooth to the touch, not tacky at all.  In the meantime, don't let anything touch your painting because it will stick like glue to it.
Here's our finished products:


You won't find any other substance that will give you such vivid shiny colors.  We had a great time and can't wait to try it again.

cindy