So school has been in session for several weeks now and it's starting to get difficult for my dear son. Maybe that's not quite right - it's starting to get hard for ME. We have been trying to work on our routines and coping strategies and it has worked somewhat. However, he is still having problems getting the homework turned in and assignments written down in his planner. With activities getting into full swing, it's getting frustrating for both of us. (When activities get going, that means Kentster is not home in the evenings because he has rehearsals and meetings.)
To add to the frustration, dear daughter wants more attention while she does homework. She doesn't have the attention problems dear son has, but she does resent the amount of time her brother gets every night. (You really have to sit on him so he stays on task with the homework and his sister is a serious distraction if she is in the same room.)
I'm trying to regroup on the strategy while I write this. We have eliminated television during the week already, but I think Kentster and I need to eliminate computer time until all homework is completed. We also need to keep the bedtime routine on schedule, beginning at 8:00 p.m. It's all written out on laminated papers stuck to the bathroom mirror - each of them has a schedule that goes in the opposite direction:
Shower (wash & brush hair)
Brush teeth
Lay out clothes for tomorrow
Get backpack together (binders, homework organized)
Put shoes and backpack by the door
It's much easier than nagging because all you have to say is: "Look at your list."
I think something else we should try is to specifically schedule homework time for timeframes between school and bedtime. What I mean is everyday has a different schedule of activities - performing arts, choir, instrument lessons, Girl Scouts, etc. If we have set times on each day, it might make it easier for me when I'm sitting here at 8:29 and dear son hasn't started his bedtime routine that was supposed to begin at 8:00 p.m. We can also give him a sense of time so he has a better concept of how long it takes him to do his homework (and everything else).
Breathe deep and count to 10 . . .
cindy

Tuesday, August 30, 2011
Sunday, August 28, 2011
Siblings
My kids are so lucky to be close. Close in age, close in size, close in time spent together. They share many of the same interests, like hanging out in bed watching TV:


cindy
They really enjoy spending time together, except when they're fighting. Sometimes it's hard to tell which one is happening at any given moment. Although they are 23 months apart (he's older), they look like twins because he's a bit small and she's a bit big. They love to go on vacations:
and enjoy the holidays together
Although they do argue and yell at each other, they love to wrestle, play, make videos and just hang out together. They especially love to laugh:
As they get older, I really hope they continue to enjoy each other's company. I know that's going to be tested as they get into the adolescent and teenage years. Goodness knows, that happened to me and my younger sister as we hit those ages. (A big "shout out" to my little sister who may be one of the few people to read my blog regularly!) Kentster and I remind our kids that when we're gone they have to be family for each other. I hope when that time comes (a LONG time from now), they can see each other as friends. Who knows? Maybe they'll even continue to enjoy watching YouTube videos on separate laptops simultaneously!
Saturday, August 27, 2011
A Woman of Value
What makes a woman meaningful and valuable in our culture? A poem might go like this:
A good woman, where can she be found?
She's worth her weight in gold.
Her husband thinks she is a good lover,
and does a good job with the kids.
She has the most fashionable clothes
and always a fresh mani-pedi.
She's active in the PTO
and supports the admirable work of Planned Parenthood.
She makes sure her kids understand what is politically correct,
and tries to be their best friend.
She takes care of the checkbook
and makes the minimum payments on the credit cards.
She's busy with book club, driving the kids to activities
and gets take-out on Monday, Wednesday and Friday.
She balances her career with home life
and occasionally has time to help with homework.
Her children are happy if she's there when they get up for school
and her husband is happy when the house is picked up.
A woman who moisturizes her skin, gets to the health club
and looks 10 years younger than her age is valued.
She's all things to all people.
Is that the standard we are striving for? Perhaps we should instead look to God's standard for women:
A wife of noble character who can find?
She is worth far more than rubies.
Her husband has full confidence in her
and lacks nothing of value.
She brings him good, not harm,
all the days of her life.
She is clothed with strength and dignity;
she can laugh at the days to come.
She speaks with wisdom,
and faithful instruction is on her tongue.
She watches over the affairs of her household
and does not eat the bread of idleness.
Her children arise and call her blessed;
her husband also, and he praises her:
“Many women do noble things,
but you surpass them all.”
Charm is deceptive, and beauty is fleeting;
but a woman who fears the LORD is to be praised.
Honor her for all that her hands have done,
and let her works bring her praise at the city gate.
Proverbs 31: 10-12; 25-31
When this life is over, I pray I might be judged kindly by God's standards.
cindy
Friday, August 26, 2011
Southern Cooking
The last couple of months I have been longing for comfort food I remember from my southern family. My dad used to make a couple, and my mom made a few too. Some things I definitely don't miss - brussel sprouts, liver & onions and "greens". (However on a recent trip to Louisville, we had some great "greens" with spinach sauted in pork fat - yum!) The two I've been particularly interested in making were chicken & dumplings and peach cobbler. One of the interesting things about these dishes is that my husband and I both remember very similar recipes from our childhoods.
For those of you with "northern" families, I'm not talking about chicken & dumplings that are big round globs of flour dropped into boiling water. I'm talking about the thinly rolled and cut dumplings that are gently placed in a pot with lots of chicken and broth. My mom and grandmother never gave me a recipe for this fine dish, but I recently found a promising one on allrecipes.com. I'm not listing it here as a recipe, because I'm not quite sure I perfected it - a little too soupy for me. I also didn't roll the dumplings quite thin enough or have the water boiling enough. Have to try it again.

In the meantime, it's peach time and I'm ready to try some peach cobbler. I was wimpy (and not true southern) by using pre-made sugar cookie dough as the bottom crust, but hey, I did try grandma's pastry crust for the top. My results were OK, but not quite good enough. Here's the peach filling before I put the crust on:

I used white peaches, which I don't think were as sweet. Being wimpy on the bottom crust wasn't very satisfying, but the top pastry part was promising. I'm going to have to give this one another try too.
I'd love to hear about your favorite childhood comfort food. In the meantime, I'll keep working on mine.
cindy
For those of you with "northern" families, I'm not talking about chicken & dumplings that are big round globs of flour dropped into boiling water. I'm talking about the thinly rolled and cut dumplings that are gently placed in a pot with lots of chicken and broth. My mom and grandmother never gave me a recipe for this fine dish, but I recently found a promising one on allrecipes.com. I'm not listing it here as a recipe, because I'm not quite sure I perfected it - a little too soupy for me. I also didn't roll the dumplings quite thin enough or have the water boiling enough. Have to try it again.
In the meantime, it's peach time and I'm ready to try some peach cobbler. I was wimpy (and not true southern) by using pre-made sugar cookie dough as the bottom crust, but hey, I did try grandma's pastry crust for the top. My results were OK, but not quite good enough. Here's the peach filling before I put the crust on:
I used white peaches, which I don't think were as sweet. Being wimpy on the bottom crust wasn't very satisfying, but the top pastry part was promising. I'm going to have to give this one another try too.
I'd love to hear about your favorite childhood comfort food. In the meantime, I'll keep working on mine.
cindy
Thursday, August 25, 2011
Musings of an Older Mom
With the new school year starting, I've noticed how my high school friends are sending their kids off to - COLLEGE! My kids are in 3rd and 5th grades. It reminds me yet again how Kentster and I are not quite like the other parents at orientation night. We are certainly not the "oldest" parents and there are others like us, but we do tend to be on the upper end of the spectrum.
We didn't exactly choose to be parents later in life. I remember in high school that my goal was to be done having kids at 30. I had good reason - my parents were "older parents." I'll never forget my first day of elementary school when the kids thought my white-haired dad was my grandfather. I was sure I didn't want that for myself. However, that wasn't God's plan for our life. We went through years of infertility before our kids were born.
Today I look at all the moms in their 20s and 30s and admire how much energy they have. Many of them are very involved with school and extracurricular activities. They have great hopes and expectations for their lives and those of their children. Being in their company keeps us young. I may not be any more experienced than they are at being a mom of an 8 and 10 year old, but I do have a little more wear on the tires of life. So here's some things I learned/observed (and still tell myself):
1. You can't schedule your life too far in advance. The best laid plans seldom go exactly the way you expect and it's a waste of time to pretend you have that much control over the future.
2. Speaking of control, lighten up a little bit. As my son's teacher said recently, college recruiters don't look at your child's 5th grade scores.
3. It's OK if children don't get to take as many dance (instrument, gymnastic, language, sports, personal enrichment) activities as you would like. They will still be well-balanced people.
4. If kids don't have a college fund, don't worry about looking for vocational schools. Many of us went to college (or more) without a college or trust fund. College has always been expensive compared to middle class incomes, but we still made it through, right?
5. It's OK to be a SAHM (or not), even if it is only for a while. College degrees and professional careers don't expire. You can go to work without being a bad mom. Don't let society dictate what is best for you and your family.
6. Don't fall into the trap of thinking that because kids are here, life (marriage, parenthood, careers, health) will be smooth sailing through the retirement years. Life is inherently bumpy with sudden drops, starts and stops. That also describes a roller coaster and they're still fun!
7. It's never too late. There is no timetable that dictates when life events will occur. You can go back to school, change careers, downsize or upsize, move to a new place. You are not locked into anything but being the best spouse and parent you can be.
8. Save what you can for the future - not just for the kids, but for YOU! Retirement seems very far away when you're 26 with two kids, but it will come.
9. The best families are not defined by their household income, the cars they drive or whether the kids have the newest/best clothes/toys/furniture. The best families are families who love each member exactly as they are.
10. Finally, don't forget about God and make sure the kids know enough about Him so they won't forget Him either. He won't forget about you.
I'm polishing my old lady glasses now and will return to my rocking chair. Hope I didn't preach too much. I'm not sure I would have listened, but I wish someone would have told me some of these things when I was younger, even before I had kids.
cindy
Wednesday, August 24, 2011
DIY - Finger Paints
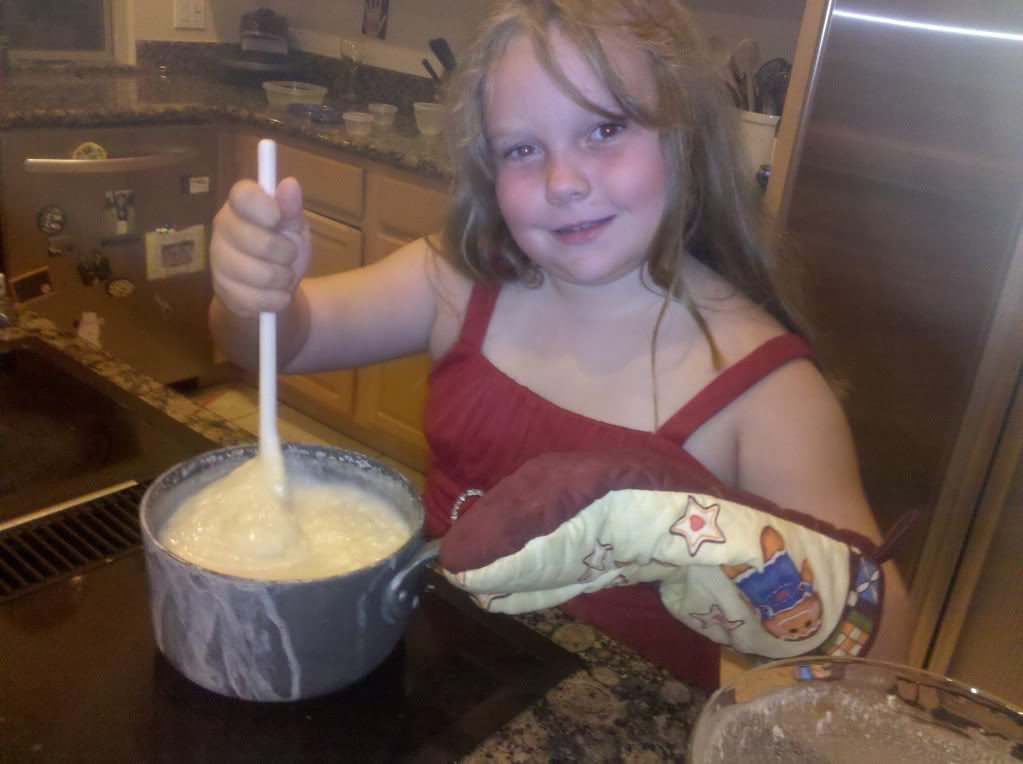
My daughter Kenzie is a Craft Diva. She is incredibly creative and loves to try new things. She found this "recipe" on About.com. We tried it out and have some "comments" of our own.
You need 2 cups of flour and 2 teaspoons of salt in a mixing bowl.


You need 2 cups of flour and 2 teaspoons of salt in a mixing bowl.
Pour 2 1/2 cups of cold water in and mix THOROUGHLY. It will take a while, but you need to get the clumps out. Mix until smooth.
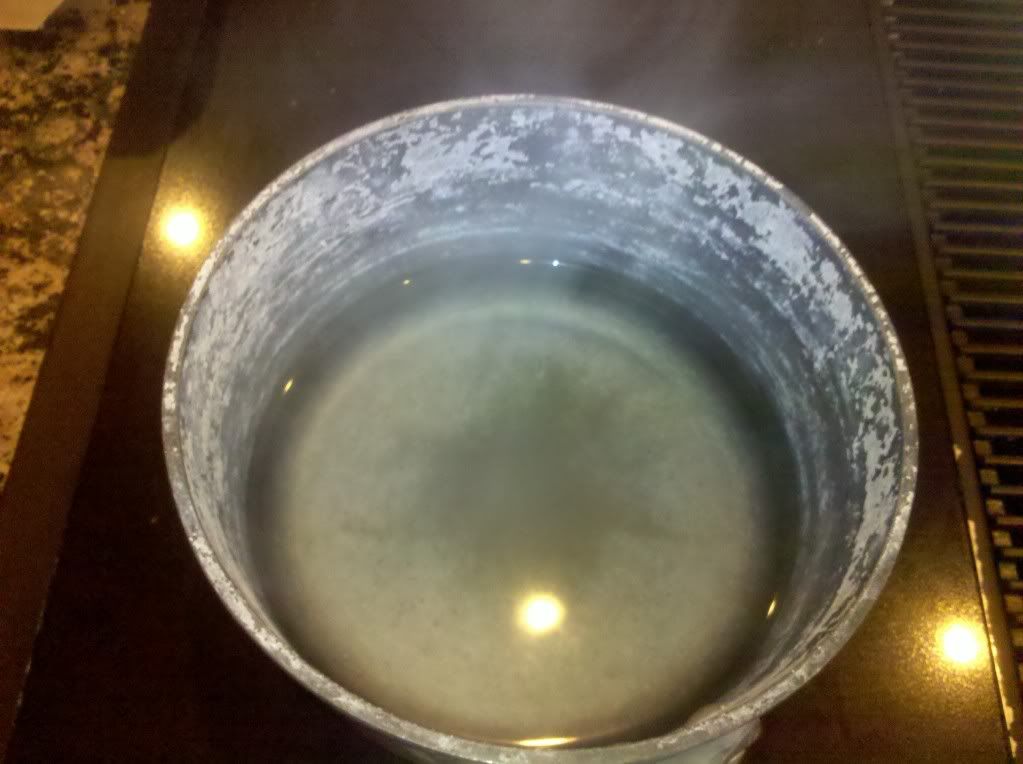
Boil 2 cups of water in panPour the flour mixture SLOWLY into the boiling water (so it doesn't clump). Stir constantly over medium heat until the mixture becomes thick (like Cream-o-Wheat). (It might take a little while)
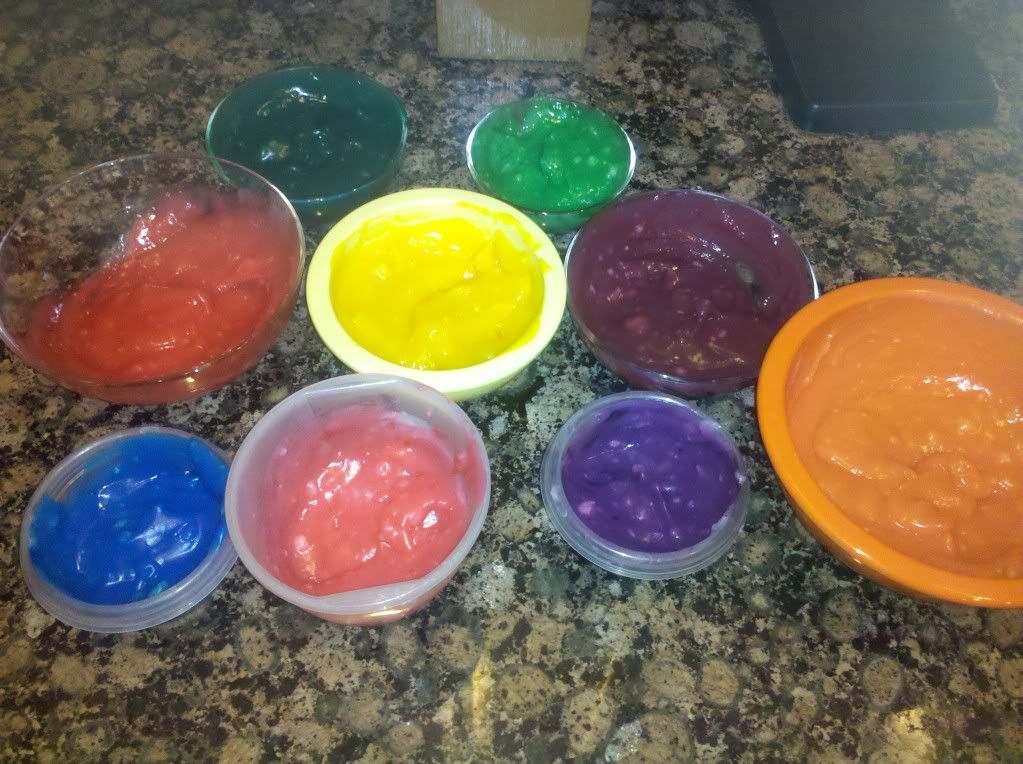
Pour the mixture into multiple containers. Glass works best because the mixture is so hot. You will have enough to make A LOT of paint. Use food coloring, but use very little. If your package describes how much to use for dyeing eggs, use half that amount. We probably used too much. The colors were vivid, but I was a little concerned about getting the dye thoroughly mixed.
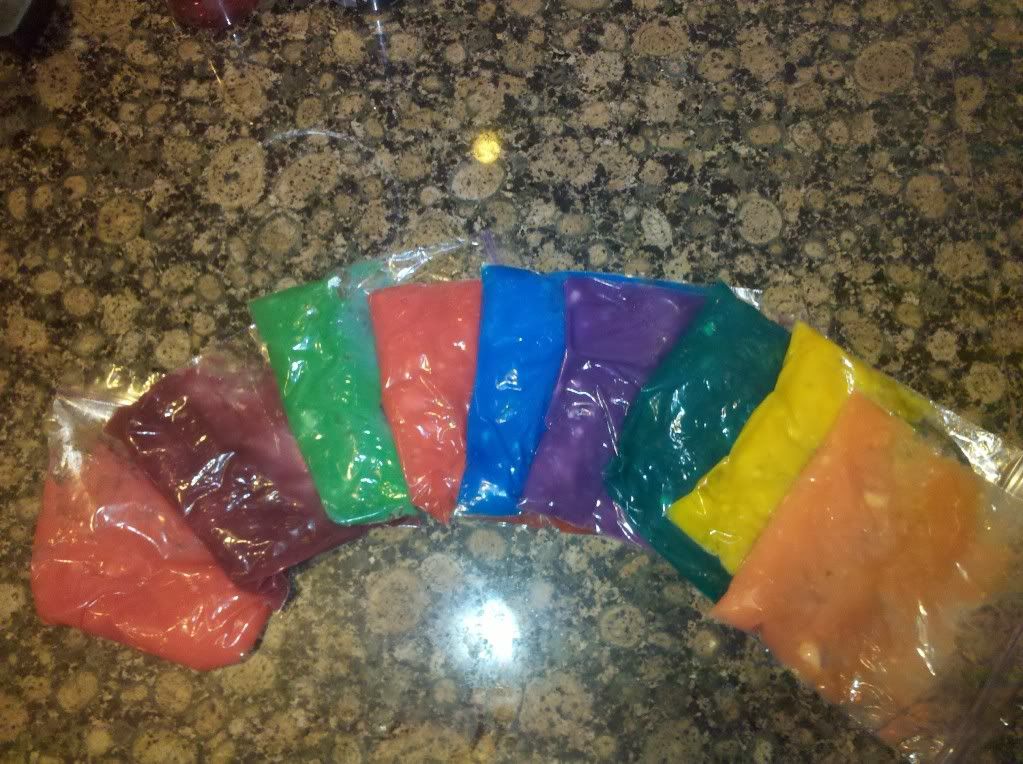
I didn't have lids to all of these containers, so I spooned each color into a Ziploc bag. That actually works very well because you can squeeze out only as much as your little artist needs. Make sure, however, that you wait until these paints are completely cooled, because I may have put ours in too soon. The bags didn't melt, but there is a bit of a "chemical" smell on the bags after one day.
Have fun painting!
cindy
Tuesday, August 23, 2011
Recipe - Easy Key Lime Pie
I saw a blog featuring a recipe for key lime pie recently, but I couldn't find it again when I wanted to make it. So hey, I improvised! I can't say this is completely original, but I will say I combined several recipes to make this one. After I finished I realized I made enough filling for two pies, so this recipe is for TWO pies.
You need: Zest from one lime, green food coloring, Lime Jello (10 oz)


One can of sweetened condensed milk


You need: Zest from one lime, green food coloring, Lime Jello (10 oz)
1/2 cup of lime juice
One can of sweetened condensed milk
One container of Cool Whip
Two Ready Graham Cracker Crusts
Prepare the Jello as instructed on the packet (dissolve packet in cold water and then add boiling water). Put in the refrigerator. When the Jello begins to congeal, remove from refrigerator. In a separate boil mixed condensed milk, lime juice, zest, Cool Whip and a few drops of green food coloring (optional). Mix well. Slowly add Jello and mix together. (If you let the Jello get too firm, you will end up with Jello chunks in your pie - but it still tastes great). Pour the mixture into the two pie shells and put in refrigerator. Allow to form for several hours. Garnish with fresh lime slices. Yummy!!
cindy
Monday, August 22, 2011
Transitions
I have a new job. I'm working as an attorney in the law department of a major municipality. It's an exciting opportunity. I wasn't looking for a job - I just changed jobs 3 months ago. I was blest to have a friend who let me know about this job which is perfect for me. It makes me feel a little guilty, because I know good, talented people who can't find work. It's very hard out there, and I've found 2 jobs in less than 6 months. Not bragging . . . just saying.
As excited as I am about this new career move, I am a little nervous too. I HATED resigning from my current position because I've known the people I worked with for a long time. I also can't get past the feeling that being in a job for 3 months and then resigning is bad form. I've thought and prayed about this and I know this is the best move for my career and my family.
Transitions are hard regardless of whether they are good or bad. So many people are struggling with downsizing and losing their homes. Others are getting used to smaller incomes. I think we are all learning what is really important in our lives - family and faith. Things aren't important anymore and if we learn anything from the hard economic times, hopefully we all learn that.
In the meantime, I am thankful for my faith, family and career - in that order.
cindy
Saturday, August 20, 2011
DIY - School Uniform Skirt
We can't seem to keep up with school clothes in this house. I do think we are lucky, though, because my kids wear uniforms. Navy blue, light blue and khaki - that's it. Shorts, pants, jumpers, skirts - easy enough. I bought enough fabric to make jumpers and skirts, but didn't get to it early enough. I needed to get something made QUICK.
I had previously purchased 1 3/4" wide black elastic, thinking I could make some cute skirts (something else I haven't done yet).

I thought it might be easy to make a simple skirt with two panels and an elastic waistband. I used a Butterick pattern that was "very easy". I took the single piece that served as the front and back panel and sewed them together at the sides.

Then I measured the elastic on my daughter's waist and made it a bit snug. I created a casing for the elastic about 5" wide and approximately the same length as the elastic, then folded it in half lengthwise and sewed a seam. Then I measured the length of the casing and the circumference of the top of the skirt. The skirt was about 13" larger than the length of the casing.
Now for the tricky part - I had to gather the skirt in some orderly way to make up those 13". I marked the center of the front of the skirt, then gathered about 5" on each side of the center. I then put three gathers in the back, each one 1".

I basted the gathers and then sewed the casing to the skirt (right sides together, casing is upside down and a single seam that goes through the gathers).

Make sure the end of the casing is matching up with a side seam. Put the elastic through the casing, sew the elastic closed and close up the casing. Put a hem in and Voila! An easy (and comfortable) school skirt!

I'm feeling very proud of myself, mostly because I haven't been sewing that long. Hopefully I will be able to replicate this non-pattern again!
cindy
I had previously purchased 1 3/4" wide black elastic, thinking I could make some cute skirts (something else I haven't done yet).
I thought it might be easy to make a simple skirt with two panels and an elastic waistband. I used a Butterick pattern that was "very easy". I took the single piece that served as the front and back panel and sewed them together at the sides.
Then I measured the elastic on my daughter's waist and made it a bit snug. I created a casing for the elastic about 5" wide and approximately the same length as the elastic, then folded it in half lengthwise and sewed a seam. Then I measured the length of the casing and the circumference of the top of the skirt. The skirt was about 13" larger than the length of the casing.
Now for the tricky part - I had to gather the skirt in some orderly way to make up those 13". I marked the center of the front of the skirt, then gathered about 5" on each side of the center. I then put three gathers in the back, each one 1".
I basted the gathers and then sewed the casing to the skirt (right sides together, casing is upside down and a single seam that goes through the gathers).
Make sure the end of the casing is matching up with a side seam. Put the elastic through the casing, sew the elastic closed and close up the casing. Put a hem in and Voila! An easy (and comfortable) school skirt!
I'm feeling very proud of myself, mostly because I haven't been sewing that long. Hopefully I will be able to replicate this non-pattern again!
cindy
Tuesday, August 16, 2011
Lilies in Indiana
Last month when we attended a conference in Louisville, Kentucky, we spent an evening on the other side of the Ohio River in Clarksville, Indiana. There we visited Falls of the Ohio, a lovely state park. Thanks to the wonderful ladies of Clarksville's Daylily Club, I saw a garden full of different kinds of daylilies.

I love daylilies from years of living in Illinois. Unfortunately, they don't grow well in Arizona, so I really miss them. I used my cell phone to take these pictures and because many of the plants were already spent, I took the pictures close-up.

Aren't they gorgeous?

I couldn't stop taking pictures of each variety, so many that I won't be able to post them all here. I had planned to write an entry about these lilies, but never got around to it.

When I heard about the tragedy at the Indiana State Fair this past week, it made me think about our trip and these beautiful lilies from Clarksville.

I thought it might be appropriate to remember the people who lost their lives and were injured last weekend. Lilies are a sign of resurrection and I'm praying those who died as well as those who are still suffering might find renewal in God's creation.

Isn't that why God gives us beauty in this life? To remind us there is more than just existing?

May God grant them peace.
cindy
Saturday, August 13, 2011
DIY - Desk Organization Set

I recently saw a picture of an adorable desk set from Pottery Barn and wanted to give it a try. I purchased four thin cork squares, an artist canvas, some fabric, ribbon and a white board with a blank calendar. I combined two squares of cork together and covered them in fabric. I used staples to fasten them to the back, but hot glue would probably work well too.

Make sure to fold the corners like a gift in order to make clean corners:

Attach ribbons to the corners to hang on the wall. After I did the corners, I changed it to a single ribbon in the center (see the final product below).

Repeat the process on the other set of corkboards. Repeat the process on the artist canvas. You can use the wooden frame on the artist canvas to hang the white board. The great thing about artist canvas is that you can push pins though. Here's the final product:

I'm going to put velcro on the marker pouch and attach it to the artist canvas next to the whiteboard.
cindy
Friday, August 12, 2011
First Day of School
We just finished the first week of school. Everyone survived and they even begrudgingly like their teachers. We worked through new bedtime routines and by the end of the week the kids were in the groove, following their lists of things to do before bed. Smooth as silk.
Every year we have a tradition of taking a picture of the kids on the first day of school. We take the picture by the front door. Here's the first picture, taken in 2006 (kindergarten and preschool)

2007: in first grade and preschool. See how my Mister Man has grown?


2009: third grade and first grade

2010: fourth grade and second grade


Every year we have a tradition of taking a picture of the kids on the first day of school. We take the picture by the front door. Here's the first picture, taken in 2006 (kindergarten and preschool)
2007: in first grade and preschool. See how my Mister Man has grown?
2008: second grade and kindergarten - the Little Miss is starting to catch up!
2009: third grade and first grade
Here are my big kids this week - fifth grade and third grade. Can you believe these are the same kids?
The beginning of the school year is always so exciting. Everything is new - new teachers, new clothes, new routine and new possibilities. I'm praying for a good year where I can watch my kids continue to grow, not just physically but spiritually, intellectually and socially.
As the Staples ad says: "It's the most wonderful time of the year!"
cindy
Tuesday, August 9, 2011
Time Island
I received a request a little while back to try out a new virtual reality game, Time Island. I'm not much of an online gamer, especially virtual reality games. However, I do have an avid gamer in my house who spends more time in "virtual" reality as opposed to "reality" reality. I had my young gamer give Time Island a try. It looks like a famous early reality TV show - you know, the one where you outlast, outwit, outplay (or something like that). On Time Island you become a castaway and need to find a way to survive on a desert island. First thing is fashion - don't forget that!
Time Island includes other players that you can meet and form "tribes." It's not like other virtual reality games where the multiple players move around in parallel. On Time Island you need to work together to find food, build better shelters and save each other from Goggs (big ugly green things). There are plenty of places to see on Time Island and lots of gear you can use to survive. (My gamer did mention that the cell phone didn't look too useful because you can't get reception on a desert island :)
The best part of Time Island is that you can't get through it all quickly. For a virtual reality world it's a must. It has to keep you engaged for the long haul. There is so much to do, it would take a long time to get all of it. The other good thing is that it's a SAFE place to play. There are actually "rangers" who roam the island watching for inappropriate behavior. The Parents' Forum keeps you in the loop, so you can understand what's happening while your young gamer can enjoy the island.
Get out there and survive on Time Island!
cindy
Saturday, August 6, 2011
DIY - Marker Pouch
Have you ever wondered what to do with those dry erase markers? Dry erase boards are very popular right now and not all of them have a marker holder. I thought I'd take a stab at designing a little roll up pouch for Kenzie's markers. I started with a piece of canvas fabric (any heavier fabric will do) and the markers I want to include in the pouch. You need to have enough canvas three times as large as the piece you see below. Cut two large identical pieces, making the width big enough to leave about an inch above and below the markers.
 Cut the length of each large piece long enough to fold over the markers and roll completely around once. Sew each piece of fabric about 1/4" from the raw edges to keep the fabric from fraying. You can also use a serger. Turn the fabric under on all four sides of each piece of fabric and sew a 5/8" to 1" hem.
 Set one of the pieces of fabric aside. Lay the markers side by side and make two pencil marks on the fabric for each marker just to the right of the marker. These will be the places where loops hold the marker on the fabric. When you're done it should look like the picture below.
 Take another piece of fabric that is one inch wider and taller than the size of the markers laying side by side like the picture on the left. Sew the third piece of fabric on the wrong side of one of the larger pieces of fabric. Make sure the smaller fabric is directly behind the marks on the other fabric.
Sew large (about 1" long) button holes over the top of the marks. You will sew a total of six button holes (for a three-marker pouch)
 Cut six strips of 3/4" elastic. How long you cut them depends on the markers you will put in the pouch. I cut mine 2 1/2 to 3" long. The strips should be short enough to hold the markers when they are vertical, but not so tight that it is difficult to get the markers in the loop.
 Cut strips of fabric to cover the elastic pieces. Make the fabric lengths 1" longer than the elastic length. Sew one end of the elastic under a hem of one end of the fabric. Attach a safety pin to the other end of the elastic.
 Fold the fabric so the right sides are together. Sew a seam to form a casing behind the elastic. The fabric should NOT be around the elastic. Attach another safety pin on the other end of the elastic that is under the hem.
 Turn the casing right side out, pulling the elastic through. Use the safety pin to stretch the elastic and fasten it to both ends of the casing. Sew the ends of the casing closed, keeping the elastic stretched between the ends. Repeat for each elastic strip.
 Push the ends of the casing through the button holes to the wrong side of the fabric. Sew the ends of the casings down, overlapping as necessary.

 Check with a marker to see if the elastic is tight enough to hold it upright. Take the other large piece of fabric you set aside and sew ric-rac or some ribbon in the center of the length, leaving some length hanging on one side. There is no need to sew the entire length of the fabric, just enough to wrap around the pouch after it is rolled up. Once you have sewed in all six casings and the ribbon on the other large piece, sew the large pieces of fabric together, wrong sides together. You should have a finished look and be able to put the markers in the loops.
 Wrap the pouch around the markers and tie with the ric-rac or ribbon. If you don't want to have a tie, you can attach some velcro to close. Once you have finished the pouch, you can attach it to a white board using velcro or a ribbon loop.
 No more losing those dry erase markers or getting them mixed in with regular markers! No more dry erase boards without markers!
cindy
Sew large (about 1" long) button holes over the top of the marks. You will sew a total of six button holes (for a three-marker pouch)
cindy
Subscribe to:
Posts (Atom)