Wednesday, May 30, 2012

Social Media Maven?

Hardly.  But I have spent a good deal of time recently getting plugged into all things social media.  It started with the SITS Girls Spring Fling, in which the amazing ladies of blogging showed us how to spruce up our blogs and become social media mavens in just two weeks.  I didn't keep up, but I did get connected with a bunch of social media.  Here's my list.  I would love if you would "like" "share" "Tweet" "pin" "join" "become a fan" "include me in your circle" or "follow my blog" (or two or three of them!)

1.  Facebook - My favorite and best (other than my blog).  Now, I'm not only me, I'm "Straddling the Gap"  This is the easiest one and I'm having a good time with it.  Click and like me.


2.  Twitter - I'm just starting to get this after my initial confusion.  I have a few friends who actually talk respond to my tweets.  I'm starting to build some followers.  I irritated some atheists the other day and I wasn't even trying.  (See below)  If you would like to be one of my followers, I'm straddlinggap or you can just click this link and follow me too.


3. Pinterest - No one had to tell me to do this.  I've been a Pinterest fan for a long time.  If you are one of the 5 people who hasn't joined yet, let me know and I'll send you an invite.  Or you can check out my pins by clicking below:


4.  Instagram - I have yet to take a picture because I have a little cell phone issue (I'll get to that tomorrow), but I do have an account and I'm really looking forward to using it.  I should have some pictures later this week.  In the meantime, I am straddlingthegap (notice a pattern here?)


5.  Google +  I signed up, but I don't really understand this quite yet.  I'm trying to click on the plus button when I like a page, but I'm not sure what else to do with it.  If anyone has any suggestions, I'd be happy to hear them.

6.  Klout - I'm in, but this one feels like watching the stock market.  My score is up, my score is down.  Heck, Klout thinks I'm an influencer on Atheism because I made one comment on Twitter and was spammed by 10 atheists.

7.  Tumblr - Again, something I have, but I'm still not sure what to do with it.  I think the tool is for following blogs, but maybe there's more.  I use Bloglovin and like it very much,

So, that's my resume for a social media maven.  I doubt it will be a profitable career, but I'm giving it the old college try.  I'm sure I will stick with some of these, especially the mainstream ones, but who has enough time in the day to work with these and write a blog too?

Just my 2 cents.

cindy

Friday, May 25, 2012

Shoes, Meet Feet.

I'll admit it - I have flat feet.  Yep, I've known it since I was a kid, we called my feet "duck feet".  It's been a bit annoying most of my life because not only are my feet flat, they are wide.  The total double whammy. Now that I'm getting a bit older (ahem), it's no longer a bit annoying; it's get thee to a podiatrist.  Anyway, while I was looking online for some way to keep slingbacks on my heels, I found some great advice on shoe/feet relationships.  If you have a love/hate with your shoes/feet, read on.  (If not, just wrinkle your nose and slowly step back.)

  • Shooting the Slingbacks - Usually, the reason your slingback shoe straps are falling off your heels is because the other end of your foot is sliding forward.  E-how has a great checklist to determine the best way to fix it, but let's just say you either need to shorten the straps, adhere them to your heels or put in an insert to keep the ball of your foot in the game.
  • Straight Lacing - Looking for fun and unique ways to tie your shoes? (Are you bored? Are your kids bored?)  This guy Ian has a website dedicated to showing you different (and sometimes decorative) ways to lace your sneakers.  Oh, and everything you ever wanted to know about shoe laces.
  • Love My Stinky Feet - That's an inside joke with my kids (who don't read my blog).  You wanna get rid of that stench?  Does your kid's closet smell like a landfill?  Here's a bunch of great ideas (not just powder in the shoes) from wikiHow.  Ladies, have a problem with shoes you wear without socks??  Here's the find of the day - Chu Shu Silver Linings!

  • Finding Running Shoes for You - Don't even read this if you don't run.  In fact, don't read this if you are still running in sneakers you bought at Target or PayLess.  If you want the right runners for you, check out this Shoe Finder tool from Runner's World
  • If the Shoe Fits . . . Did you know there's a method for finding shoes that fit?  I know I didn't.  I thought if you know your size, you just buy that size.  WRONG!  For more awesome tips (like what time of day to try on shoes or which foot to use), check out DrofPodiatry

  • Oh My Aching Feet!  You know they do.  There are lots of reasons for aching feet and just as many ideas to relieve them.  Find out everything you ever wanted to know about aching feet (as well as every common foot problem known to man) from Squidoo
Now my dogs are barking and the hounds are howling.  I need to get out of these shoes and relax!


cindy

Wednesday, May 23, 2012

Constant Computer?

I have this little problem in my house.  It looks a little like this:


No, Brodie doesn't really use the computer, but everyone else in the house does.  There are two kids and two adults living here.  There are 3 laptops, 1 tablet, 1 I-Touch and 2 smart phones.  Yep, we're pretty wired.  While it's a great convenience, it's become a real problem.  The kids spend too much time on the computer and we parents aren't much better.  I do feel pretty comfortable about what we're *not* looking at - we have Covenant Eyes installed on our computers and it's a pretty good filter.  However, I'm still pretty concerned about things like YouTube, even with the filters.

About now you are thinking - just turn it off, and you're right.  However, computers are to my kids what TV was to me.  It's going to be a bit of a challenge now that school is out.  We're trying to keep them busy, but I definitely think we will have to set specific time limits on computer time.

If anyone has any similar experiences, suggestions or alternatives, I'd love to hear from you!

cindy

Sunday, May 20, 2012

Decorated Craft Room Pails

I'm still finishing up my new craft room, but I'm already enjoying it.  It's the most "me" room in the entire house - my own little retreat.  I needed a bit more storage for some little things I use by the sewing machine, and I found these adorable tin pails at Target - $1.00!  I also found this "HOME" wooden accent at - wait for it - Big Lots!  They have a whole Americana line of decorative items.  I need to go back and revisit them.

Anyway, back to the tin pails.  I bought some red acrylic paint and stencils and put the words I needed on the pails.  The acrylic actually works pretty well on the metal.


Hey, that word on the pail is "button".  (I don't know what you were thinking.)  I had to wait a long time for the paint to dry on each letter, but I loved the effect.  Also, I had to make sure to tape the stencil on the pail before stenciling because of the curve.

I haven't figured out what to do with all of them yet, but I'm sure I'll think of something.  I have just a few more things to take care of in this craft room.  My next big project will be taking an armoire and turning it into a scrapbook station.  Then I need to find someone that can hang the TV on the wall.  Then I'll be done with my new craft room.

I can't wait to show it!


cindy

Saturday, May 19, 2012

Rag Quilts - Tips & Hints


I love making rag quilts, but most of what I've learned about making them I learned by . . . making them.  Every time I make a new one, I learn a little more.  Some of the hints work for all types of rag quilts and some are specific to flannel rag quilts.  Here's a few things I've learned to give you more time to sew, and less time to "learn".


Tips for flannel rag quilts:

  • Wash the flannel before cutting.  This is a subject of great debate, and I don't have a specific opinion.  However, if your flannel has sizing in it (feels a little stiff), definitely wash it ahead of time.  With cotton, you always want to wash and dry it first.
  • Be careful with your sewing machine.  Flannel can be tough on a machine.  Brush out the lint OFTEN (especially around the bobbin case) and change the needle at least once during the project.  You may also want to oil the machine, especially if your machine starts to make "chunk" sounds.
  • You don't have to use a piece of fabric between the layers.  Flannel is thick enough without a middle, but your quilt will be more lightweight.  If that's not your goal, use another piece of flannel in the middle, or for real "cushiness" use fleece.  (If you do that, be sure to read the tip above about your sewing machine - read it again and again)
  • DON'T make the middle piece of fabric the same size as the outside pieces.  In using flannel, it will get too thick - 6 layers to sew - which is not good for your machine.  Make the middle piece about an inch less around the edges than the outside pieces.  If you are creating a rag quilt with cotton, you can plan the colors of the middle fabrics so they contrast when you "rag" the quilt
  • Don't worry too much about cutting the squares perfectly.  Flannel is very forgiving.  I'll say it again - flannel is very forgiving.  That's why I started with flannel rag quilts.  By the time you sew them together and rag them, you won't notice if the squares are perfect.

Tips for all rag quilts:

  • Use 1" seam allowances for the best "ragging" effect.  That means you need to cut the squares larger.  Consider - a 5" square will result in a 3" square with ragged edges.  If you're trying to achieve a specific size quilt, do your math - carefully!

  • Wash, wash, wash.  The more you wash a rag quilt, the better the effect

  • Think about using decorative stitches for the "X" on each square.  You can also use different colored thread on the needle and the bobbin.  That way the stitches don't have to be the same color on both sides.

  • When you sew the "Xs" keep the "wrong" side up.  The "wrong" side is the side with normal (not ragged) seams.  By having that side up when you make the "X" you can keep an eye on it.  After all, it's the side that will show the seams the most.
  • Sew the individual pieces using a "flag" technique.  Sew one of the diagonal lines and then add the next block without cutting the thread between them.  This will create a "flag banner"


Don't worry about overlapping corners - they are going to get cut and ragged anyway.  This makes the process go so much faster and you will use less thread.  After you sew one diagonal on all the squares you can cut them apart and start all over again with the other diagonals.

  • When sewing the blocks together, use a zig zag stitch - that will give you your best chance of keeping the squares even

  • I get this question a lot - how do you "rag" the corners?  Decide which direction you want to use and go all one way.  Again, rag quilts are very forgiving!
  • Finally, there is one tool you MUST have!  In order to rag the quilts, you can use scissors, but your fingers will go numb pretty quick.  You need spring loaded snippers.  You can find them in any fabric store that sells scissors.  
Have fun - don't be intimidated - here it comes - rag quilts are VERY forgiving :)

cindy

Thursday, May 17, 2012

DIY Girl's Summer Camp

Last week I posted about getting together with other moms to "share the joy" of having the kids at home all summer.  I suggested taking turns hosting a day camp.  Last week it was the boys and now it's time for the girls.  Even if you don't want to have other girls, here are some ideas of things to do with girls when "I'm bored!" inevitably comes.  A lot of these will look like my suggestions for boys, but they're equally applicable to girls.

1.  Swimming. This is a staple stand-by, but try to spice it up.  Go to a different public pool or a water park or get out the "slip and slide" with bubbles or shaving cream.  Hose them down when you're done.

2.  Biking. Again, take the bikes somewhere new and explore.  Many areas now have designated bike paths so you don't have to worry about traffic.

3.  Visit a Museum. This can be a great way to beat the heat and can occupy the entire day. Every area has their own "best" museums.  Here in the Phoenix area we have the Musical Instrument Museum which is just what it says, and more.  You can listen to a number of instruments you've never heard before, or try some out. You may have a great science, children's or natural history museum close to you.

4.  DIY Spa Day.  Break out the cucumber slices, lotions, nail polish and foot bath.  You can take turns with manicures and pedicures, or, if doing it yourself doesn't appeal to you, head out to the local nail salon.

5.  Crafts.  This is, of course, my favorite.  It's probably a good idea to have a plan for a specific craft ahead of time so you can have everything ready.  As an alternative, you can get out a bunch of random supplies and scraps and let them create a masterpiece!

6.  Shopping Spree.  This isn't what it sounds like.  There is no money involved.  Take the girls to the local mall and give them $1,000 in pretend money.  Keep a tally for each and let them go wild.  This is great fun and teaches them the value of money.  (You won't believe how easy it is to spend $1,000!)

7.  Fashion Show.  Have each girl bring some clothes and shoes (especially ones they would like to swap). Have the girls take turns putting together outfits with all the assorted clothes.  Perhaps they can even swap clothes!

8.  Nature walk.  Time to get outside again!  Go to a local park or nature area and give the girls a list of things to find (like an ecological scavenger hunt).  The first girl to get every item wins a prize.

9.  Cake decorating.  This is fun whether you have a lot of supplies for decorating or just a few.  Each girl gets to make her own cake (preferably from scratch) and then decorate it.  This is a great way to teach girls about following recipes and cooking.

10,  Pop Popcorn and Watch a Good Movie.  This is a no-brainer and makes for a quiet afternoon (as long as you pick out the right movie).  Don't be afraid to pick out a movie the girls have never heard of, especially if it is an older movie.  You'd be shocked to find out that little girls love Shirley Temple movies!

Hope that's enough to get you started.  I'm jealous now because I work full time outside of the home and I would love to do all of these things.  Please live vicariously for me this summer!

cindy

Monday, May 14, 2012

Chance Encounters

This is Emma.


I was sitting in a local theater waiting for the show from the Do Re Mi School of the Arts.  (My son loves performing.)  I felt a little hand tap on my hand and looked over to see this adorable but serious little face standing in front of the seat next to me.  She said: "Would you mind holding my seat down while I sit?  The seat makes me nervous that I might fall on the floor."  She immediately made me smile.
She told me her name (Emma), that she is 4 years old, and was attending the performance with her sister and babysitter.  They were there to see Mary, the babysitter's sister.  "Do you know Mary?" she asked.

She kept talking. "I have definitely been here before.  I remember those chairs and that piano."  She pointed to the props on stage.  "Yes, I've definitely been here before."  I introduced her to my daughter, who was sitting to my left.  Mackenzie was immediately charmed by this little girl.

By this time Emma was becoming more comfortable with me, and asked if I would tie the ribbon on her dress.  Then she started to get silly.


She and Mackenzie got the giggles and then she wanted to make faces.


(By this time her big sister was having fun too.)

When the show was ready to start, the lights went down and Emma put her hand on my arm. "Is this going to be really loud?"  I told her no.  "Will the lights come back on?"  I told her yes.

For the next two hours, I watched her out of the corner of my eye as she giggled, bounced in her chair and clapped for the kids onstage.  Despite the length of the show, she never fidgeted, but sat in her seat watching intently.  When "Mary" finally came onstage, she turned to me: "That's Mary!"

By the end of the show, I couldn't tell which entertained me more, the kids on the stage or the one sitting next to me.  After the show, she turned to me and said "I have to go now.  Thanks for sitting with me."

My pleasure, Emma.  My pleasure.


cindy

Saturday, May 12, 2012

Craft Fail and Red Room Reveal

This one has been a long time coming.  It all started several years ago when I found these cute long curtains that fit my son's room perfectly at a garage sale.  At only $3.00, they were something I could cut up without fear.

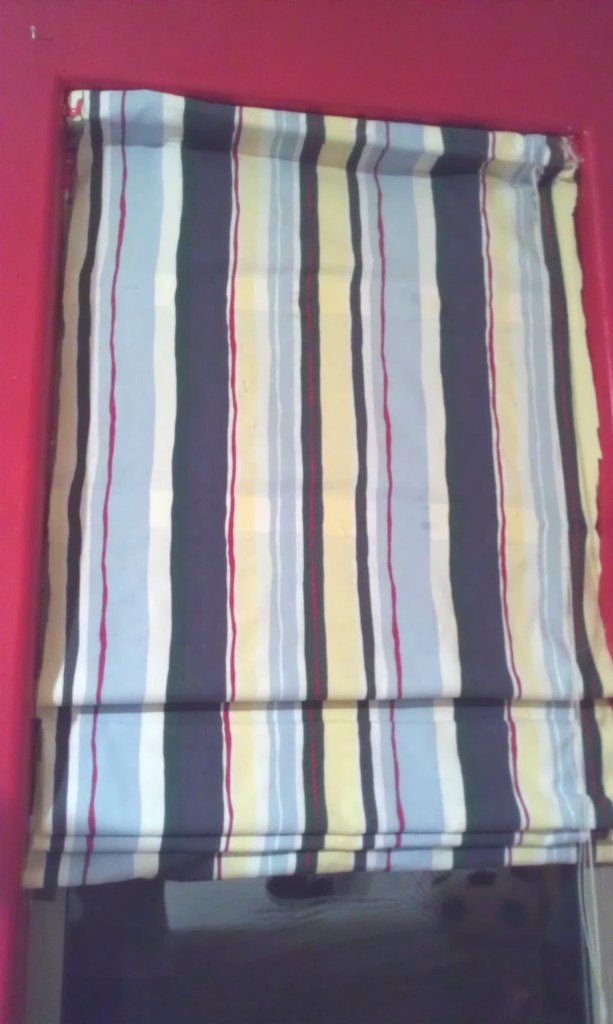
Next I found this amazing DIY for Roman shades, something I've always wanted.  Using the existing wooden blinds, I cut them up, retaining just a few for the shade. I cut the fabric, glued it to the blinds and I was ready to hang. That process took me months, because on some level I was nervous about the whole project.  In addition, my son wanted his room RED, which I agreed to do for one wall only.
After cursing my way through the painting (the reveal coming soon), I hung my fabulous shade


Ugggh!  Where to begin? The width was too wide and the "shades" didn't work.  This is about as good as I could get it positioned.  I worked so hard, but just didn't have the heart to take it down.  So I didn't.  For months.  Meanwhile, the other window had nothing on it for the same amount of time.  (Don't worry, the room opens to the backyard, so there was no problems with anyone seeing inside.)

Finally, about a month ago I decided I needed to correct finish the job.  I took the other matching curtain and tried to make it "look" like the other by sewing in pockets.  Once again, lots of work, horrible results.  This time I didn't even have the heart to take a picture of it.  I ripped them down and the nightmare experiment crashed and burned ended.

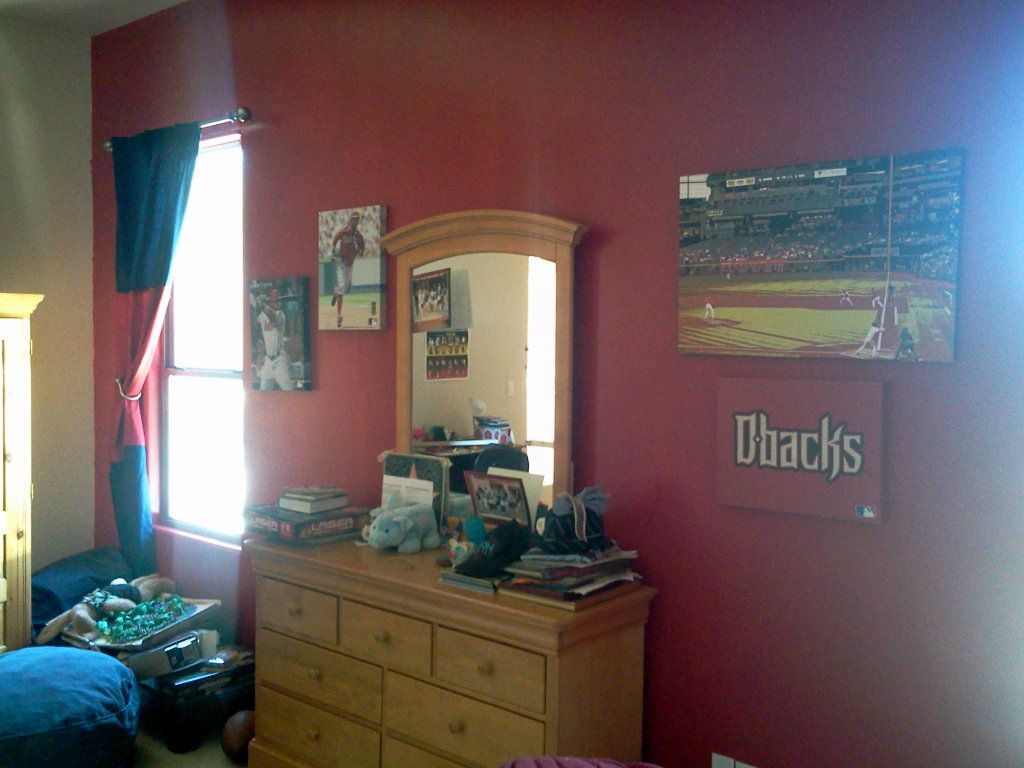
As an alternative, I thought I wanted to have straight long curtains.  Again, I was so proud, because I found some solid navy blue and solid red sailcloth curtains at Target for about $3.50 each (big sale).  My plan was to cut them up and sew the blue and red together in bands of color on the panels.  Good plan.  I bought them and got home to find I didn't have enough length for two panels on each window.  I ended up making a long panel for each window and swag it on one side.


I hung the Diamondback canvas art I bought at Target and a garage sale (all for great prices) and FINALLY the red wall is done!  It's not perfect, but I am so relieved to have it done!

cindy

Wednesday, May 9, 2012

DIY Day Camp - Boys

I was recently tweeting with another mom who was dreading the summer break (hi Jenny!) and it made me remember something I did with my niece and nephew one summer.  I did a weeklong "day camp" (called it Camp Campbell).  This is a great idea to get together with other moms who can also take another week to host their own "day camp."  It's a bit fun to be a camp/activity director for 5 days, but you have to be prepared.  When I did it with my niece and nephew, I had to plan the days out ahead of time (there's nothing worse than a bunch of kids with nothing to do).  Here are some ideas of "camp" activities for boys (I'll do girls tomorrow):

1.  Swimming.  This is especially great if you have them all bring a water weapon and let the water wars begin.  Marco Polo anyone?
2. Bike rides. 'Nuf said
3. Hikes. Take the boys to your favorite wooded areas or trail and set them loose.  Maybe you could do a scavenger hunt?
4. Make homemade pizza - fun and gets them through lunch!
5. Make paper airplanes.  Have contests for whose flies the best or looks the best.
6. Wiffleball game.  This is great for a backyard or park where you don't have to worry about losing a ball.
7. Video game tournament.  This can go over several days.
8. Movie afternoon in your home (or better yet, outside if you can).  Break out the popcorn and movie candy.
9. Make a movie!  If you have one or more video cameras, this will entertain them for more than a day. They come up with their own plots, dialogue, costumes etc.  At the end of the week, have a film festival!
10. Play poker.  Now I know some may object to this, but boys will be fascinated for hours.  You can play for cookies, small change or just a prize in a "tournament".

Those are just a few ideas and you could probably think of more. You can also purchase "The Dangerous Book for Boys" which may give you even more ideas.  You can also get "The Pocket Dangerous Book for Boys - Things to Do".  Don't forget - plan, plan, plan.  The best camps are ones with activities planned in advance.  You can always schedule time everyday for free play with TOYS (you remember those, right?)  The important thing is that the boys understand it's "camp" not a democracy.  They need to know they are coming to do whatever the "activity director" has planned.
Best of all, you get to have some organized fun AND if you get other moms to play along, you get a couple of weeks to yourself!

Tomorrow I'll get into the day camp for girls!

cindy

Monday, May 7, 2012

Spring Fling With the SITS Girls

I'm participating in the Spring Fling!  It's sponsored by the SITS Girls, which is a collective of over 40,000 bloggers who work together to promote each other's blogs.  The Spring Fling is a two week effort to help participating bloggers (like me) to improve our blogs and traffic. 

What does that mean to my readers?

Well, you should watch for some subtle changes coming to Straddling the Gap.  I will be fully using social media, including Facebook (getting my own STG page), Twitter (I'm already there as straddlinggap), Pinterest (there as Cindy Campbell) and even Google + (which I know absolutely nothing about).  I'm going to work at sprucing up the look of the blog.  I might even host a linky party or blog hop.  (For those of you who are not bloggers, don't worry, it's cool stuff).

What's all the fuss about?  Well, Straddling the Gap is celebrating its one year anniversary next month and I want to make it big.  I also may be taking another internet step that I don't want to talk about just yet, but hope to reveal in June. 

Hopefully you will like all the changes and improvements.  Stay tuned.

cindy

Sunday, May 6, 2012

Awesome Garage Sale Day!

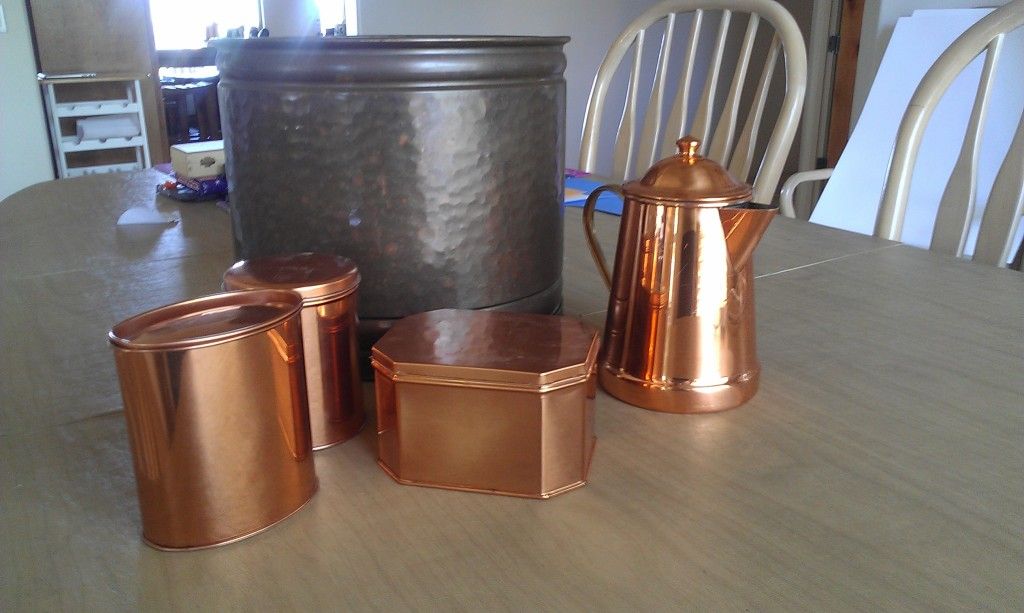
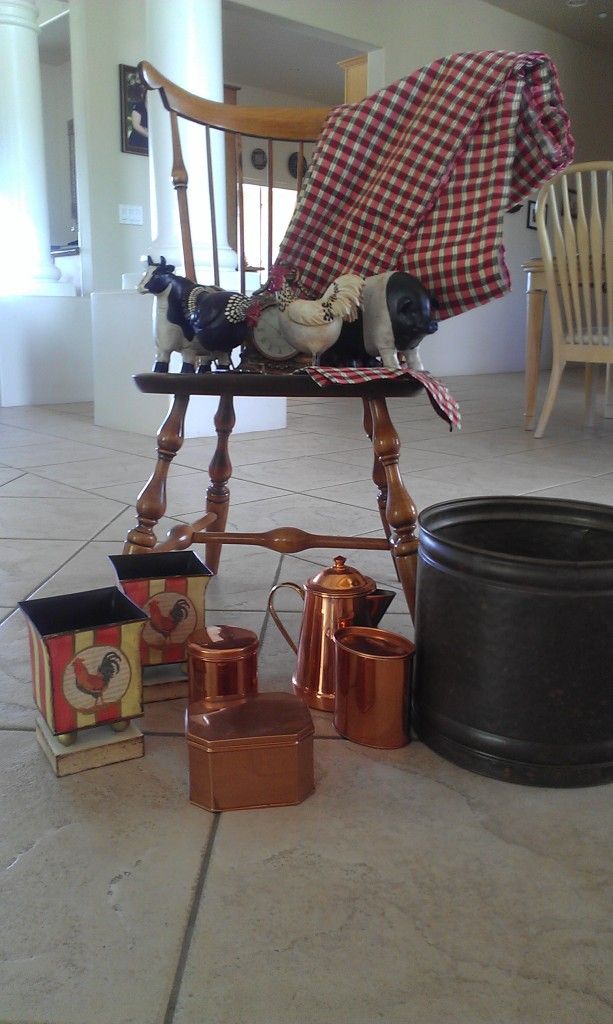
Yesterday I did something I haven't done in ages.  I headed out searching for a wooden desk chair for the new craft room and some decorate items for the high shelves (you know, stuff that's going to gather dust).It started slow, and then I found some copper items:

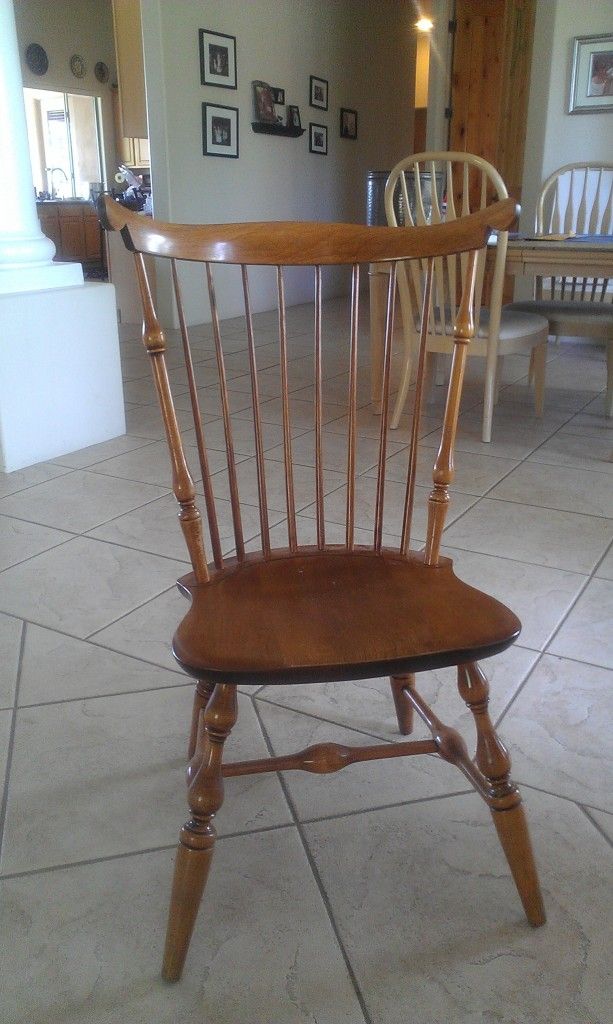
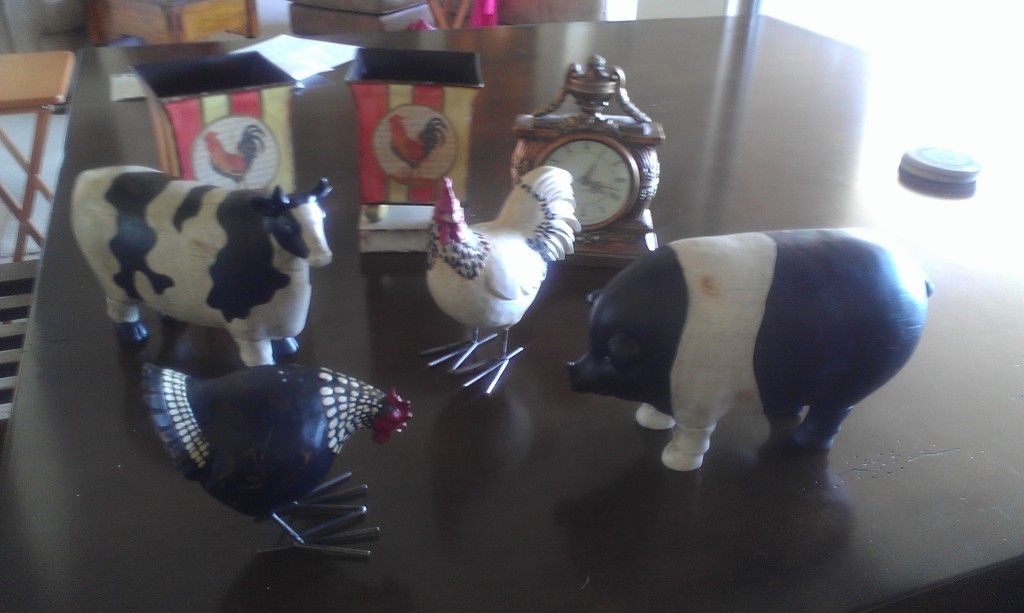
Next I found a sweet little gilded desk clock (that works!).  (You can see it in the upcoming picture.)  Then, just as I was on my way home with just those few treasures, I hit the motherlode!  It was these multiple family/cul-de-sac garage sales.  I found the wooden chair I was looking for at the first one, as well as the first rooster metal vases and a double valance.


Yeah, success at what I was looking for.  Then, I crossed the street and found French provincial heaven:


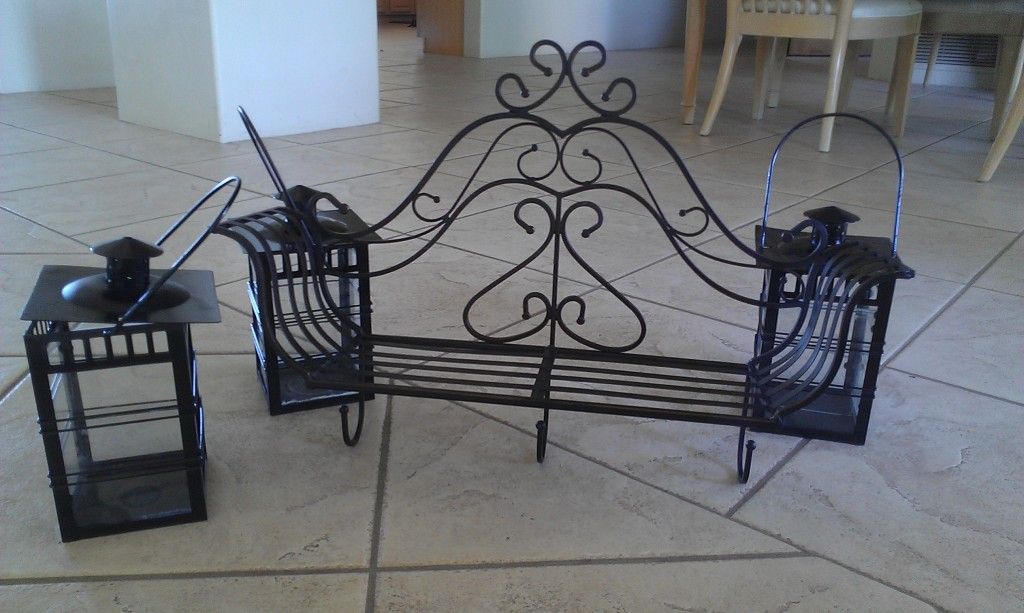
The clock and the rooster vases are behind the animals.  I also found the coolest rack and lanterns:


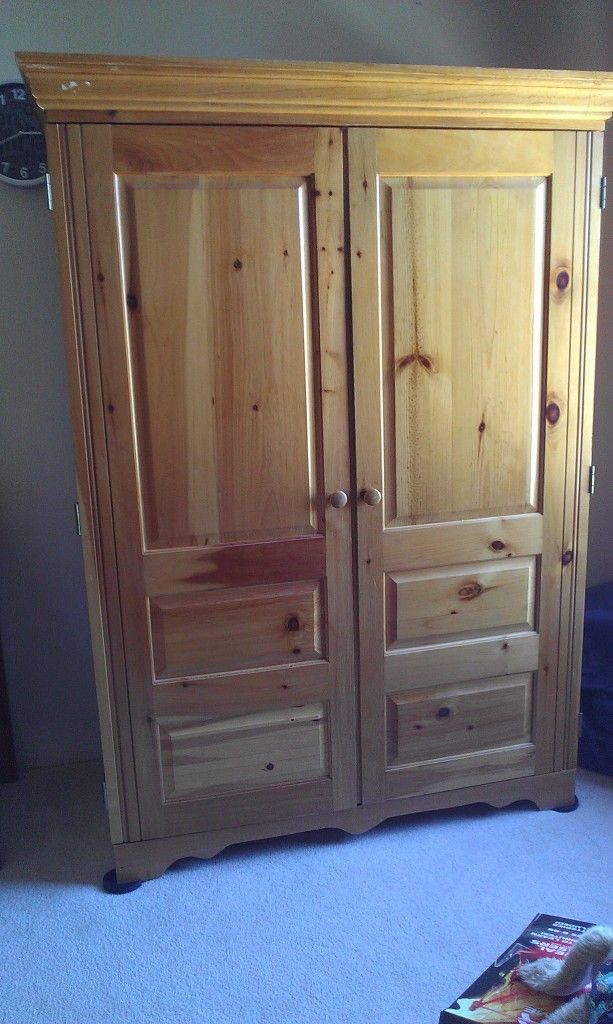
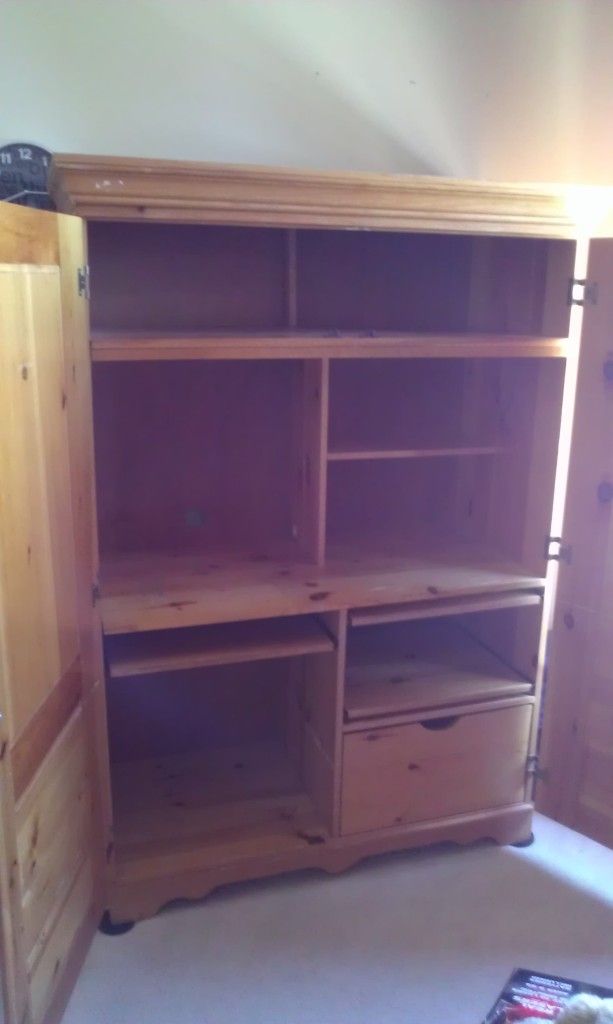
And, as a bonus, we found this pretty pine armoire for my son's room:


All for less than $150!  Nice haul, huh?


I'm that much closer to the completed craft room!

cindy

Tuesday, May 1, 2012

Chance Encounters

Last weekend I had the pleasure of meeting the parents of one of my dearest friends.  My friend is one of the kindest people I have ever met, with an infectious smile and a warm hug.  I was intrigued to discover the people who raised this very special person.  I was not disappointed.

Her dad is a character.  No, really, a character, someone bigger than life.  He's a big guy with a huge personality.  The best description I can offer is that he is the ultimate Texan.  He knows everything about oil and Texas history and other interesting topics and he's not afraid to share it.  He's one of those rare people who can be a big personality without being a big ego.  KWIM?

Her mom is a sweet, nurturing woman.  She doesn't say too much, but it's not because she's shy or doesn't have anything to say.  It's because she is a listener, and a good listener at that.  She looks right at you when you talk and is genuinely interested in what you have to say.  She's proud of her daughter, but more importantly, admires her as a person.

As interesting as these people are, that's not why I was so fascinated with them.  What is remarkable is how my friend is the perfect combination of both of her parents.  She's a wonderful listener, compassionate and sensitive.  At the same time, she has a smile as big as Texas and a mischievous twinkle in her eye.  Wherever she goes she fits in and charms everyone in the crowd.

As interesting as it is to see the physical resemblance among children and parents, it's so much more enlightening to see the "inner" resemblance.  It brings a whole new facet to a dear friend and I'm privileged to have experienced that chance encounter.

cindy

DIY - Origami Ninja Stars

My Craft Diva has struck again!  She learned to make origami ninja stars all on her own (with the help of YouTube and a friend at school).  They are so cute to make and will challenge you and your kids.  They also make cool banners. There are many photographs in this tutorial so please be patient while the page loads.


Here are the directions according to Mackenzie:

1.  You need 8 pieces of 8 1/2 x 11 paper, assorted colors (printer paper works great) and scissors


2.  Fold one piece of paper across on the diagonal evenly, which will leave an extra amount of paper at the bottom


3.  Cut the bottom of the paper off to make a clean triangle (or a perfect square when the paper is unfolded).

4.  Open the paper and fold across the other way to make another triangle.  Unfold the paper.  You should now have a square with fold lines making an "X".  It is important to make all of these creases.

5.  Fold the corners on one side of the square to the middle.

6.  Fold in half so it looks like a paper airplane with a single point "nose" on one end and open back.

7.  This is the tricky step: hold the "paper airplane" as if you are going to throw it with the "nose" of the plane farthest from you. Turn the plane upside down so you are looking at the back of the plane and it looks like an "A".  Put your index finger on the top of the "A" and push it down.  The creases you put in the paper earlier with fold and the top of the "A" will push down to the middle of a triangle, like this:

8.  Keep pushing down on that crease so it folds to the inside

9.  Turn the paper to the left and you should see a parallelogram with the left side sloping downward to a point.

10.  Repeat with each piece of paper (7 more times).  Arrange them in the circle design you want.


11.  To assemble the ninja star, start with two of the parallelograms.  Hold then in the direction of the parallelogram shown in Step 9 above, one behind the other with the left side sloping down and the crease on top.  Insert the parallelogram on the right into the back of the one on the left, aligning the left slope of the right parallelogram with the top crease of the left parallelogram.  It should look like an angle:

12.  Fold the tips of the top of parallelogram on the left over the one on the right.  In this case, fold the blue edges over the yellow paper, tucking them into the open fold.

13.  Repeat for the remaining parallelograms, working around to the right in a clockwise direction.  When you get to the last section, fold the last corners over both layers of paper to the center.


14.  Ninja star!!  (Wait a minute, that doesn't look like a star . . .)

Watch what this ninja star can do!

15.  Push one side in gently, and then the other sides:


There it is!

You should be able to move the pieces back and forth, but be gentle!  Enjoy!

cindy