Showing posts with label Scrapbooking. Show all posts

Monday, April 14, 2014

Easter Bunny Place Cards


Looking to incorporate your creativity into your Easter table?  I made these place cards several years ago for Easter and I still think they are so cute.  I think I found this idea in Family Fun magazine.  They are a great example of paper piecing:


These are not too hard to make, although they take a bit of time.  Hopefully, you are not having too many people to Easter dinner - I had 12 that year :)

You need scrapbook paper in two solid colors, one in a patterned color and some white for Mr. Bunny.  You also need vellum paper, brads, a little ribbon and some 3-dimensional adhesives - like sticky foam squares.


Because I made these several years ago, for this tutorial I used slightly different colors.  First cut your card (background paper) into 3"x 5 1/2" rectangles and fold in half.  If you have a scoring tool, this will make your fold cleaner.


Next, cut your front square in a contrasting color.  Mr. Bunny will sit on this square.  I used pastel green because it matched my china pattern.  Cut the squares 2 1/2"square.


Next cut the patterned paper in a rectangle about 2 1/2" x 1".  This will be the background for your vellum name.  I used a pink gingham, but you can use any pattern.  

Now comes the part that many might find intimidating but it's pretty easy.  Take the white paper and draw a head (like a fat pear), two ears and two fat feet (look like elongated circles).  You might want to start by drawing them, but once you feel comfortable, you can probably cut them without patterns.  Remember, each Mr. Bunny is unique.


Next, draw two big dot eyes close together, a long skinny pink nose, a little line below the nose and whiskers on the face.  You also need to draw paw marks.


Using your computer's printer, pick a fun font and print the names of your guests on an 8 1/2 x 11 piece of vellum.  A thicker, paper weight vellum does great in a printer.  Once you print all the names, cut them in rectangles just a little smaller than the patterned paper.  Get some tiny ribbon and tie little bows.  Add a little hot glue drop if you are nervous about the bows coming apart.  Now you are ready to piece.

Start with the background paper and glue the square onto the front half.  Piece each piece of Mr. Bunny on top of the paper, with the head on top of the ears and feet which are glued first to the paper.  You may want to use a 3 dimensional adhesive to make Mr. Bunny pop (or in his case, hop).  You will want his feet to slightly overlap the patterned paper and his ears to stick up above the fold.  A pair of tweezers will help immensely.


Now you want to layer the patterned paper (in purple above) over the green and then the vellum with the name over the patterned paper.  You are going to hold them together with metal brads.  (Here's a bonus tutorial on how to apply a brad.)  A brad is a small piece of metal you drive through your paper to attach papers in a decorative way, or, in this case, attach a piece of vellum.  It's very hard to glue vellum without it showing.  I also like brads because they come in a variety of colors.  On my sample I used a pastel green brad, but here I'll show metal brads.


That silver cylinder thing is a brad tool.  Notice that the end is not flat, but has a tiny point that you insert in the brad to hammer it.  I like this tool set from Making Memories.


Put the brad, smaller side down, over the papers you want to hold together.  In this case I'm driving the brad through 4 layers - the vellum, the pattern contrast paper, the square for Mr. Bunny and the top of the place card.  Use a hammer (see the one above) to pound the brad tool down, driving the brad through the papers.  PLEASE make sure to use a hard surface - the harder the better (granite countertops, tile floors, heavy wood furniture) - AND a self healing mat (or plastic cutting board in a pinch) under the papers.  If you don't, you WILL have a mark in your surface underneath the papers.  Once you hammer the brad through the papers and turn over the papers, it should look like this.


Take the same brad tool and insert it over this side of the brad and pound it down.  It will force the brad shaft to spread, "grabbing" the paper.


You've done it!


Your guests will be so impressed at your craftiness and that you cared enough to make beautiful place cards.  Depending on the colors you pick with your dinnerware and tablecloth, they can also make an attractive addition to your table.


Happy Easter!

cindy

Monday, February 11, 2013

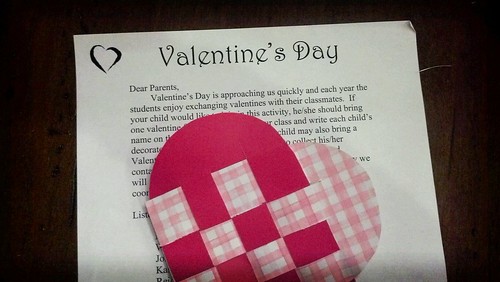
Valentine's Day DIY Hearts

Being the "crafty" mom I am and having the "Craft Diva" for a daughter, I can't let a crafty holiday like Valentine's Day go by without making handmade valentines for her class.  They are such a great alternative to the little boxes of cartoon papers.

This year I found a cool idea from Pinterest:


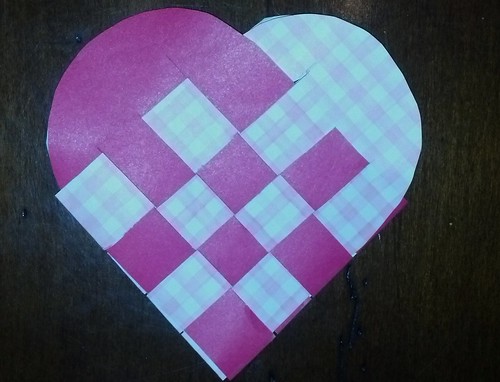
These are actually Danish hearts that are traditionally made at Christmas.  In this example, they are made with felt, but in blog page describing this craft, there is also descriptions of the hearts being made from paper. Voila!  Perfect valentines!  Did I mention that these hearts open up to little baskets that can be used for candy, notes, etc?


Valentines day
Here's how I made mine:

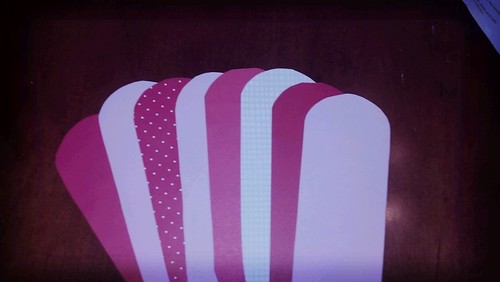
I used pink and red (prints and solids) from my enormous stash of scrapbook paper (that almost never gets used).  I didn't use a card stock weight, but instead the thinner weight (something between copy paper and card stock).  I cut an oval about 4" wide and 10" long from heavier card stock for a template.  You can make it whatever size you want, but the way I created mine was to use a circle 4" in diameter and cut it in half to make the ends.  Then, make it the length you want.  The shorter the length, the smaller the heart and resulting interior "basket".

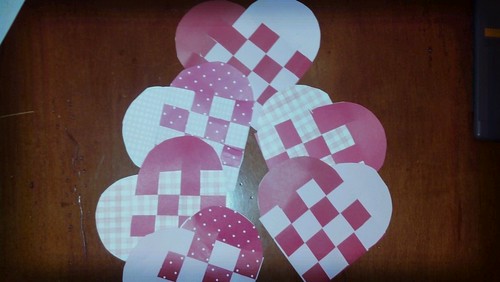
Using the template, you will need two ovals for each valentine.  I made a bunch because I have to make 30 for my daughter's class.


Untitled

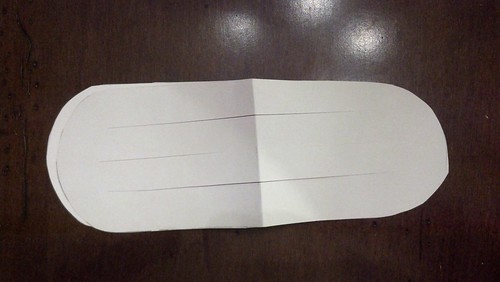
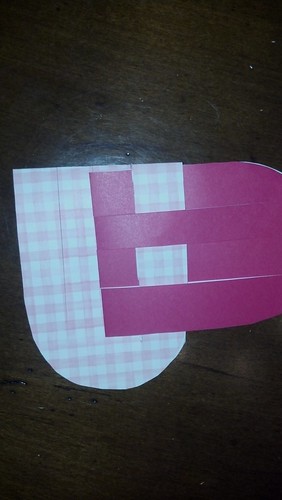
Take your two ovals and fold them in half together, print side out.  Then cut three cuts through both ovals, beginning at the fold and up to about 1" from the curve of the oval.  The spaces between the cuts will be the sections that are weaved together.  I tried being very exact about the width between each cut and making sure they were perfectly matched.  Don't bother.  If you fold the two ovals together and cut both from the fold, they will be fine.

Untitled


Untitled

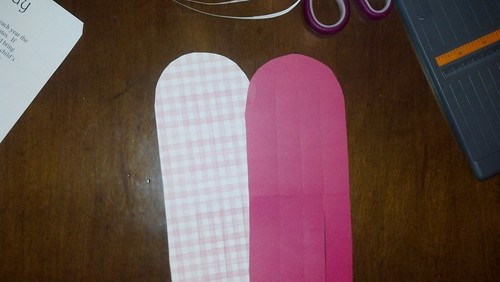
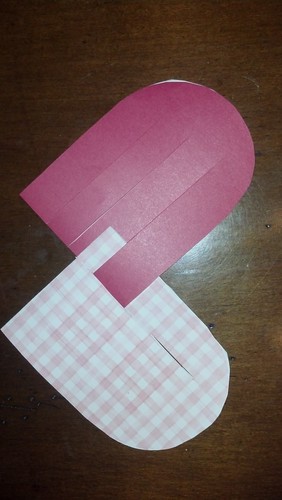
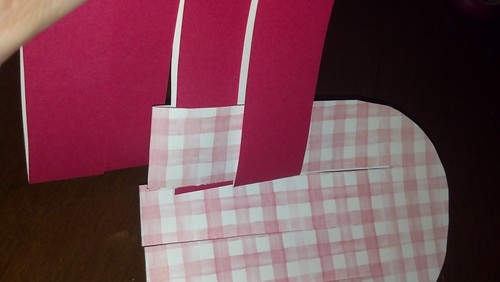
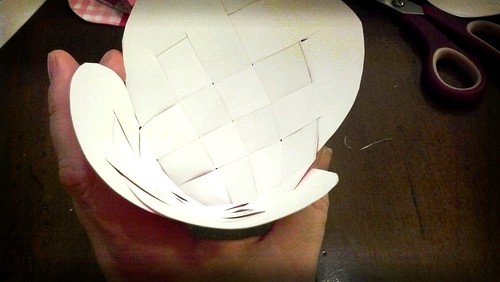
Now you're ready to weave.  Hold the folded ovals at the top curves in either hand.  If you understand the idea of weaving in and out, you're halfway there.  The only difference here is that the papers must cross in the folds to create the in-out weave.


Untitled
Untitled


Untitled
                   

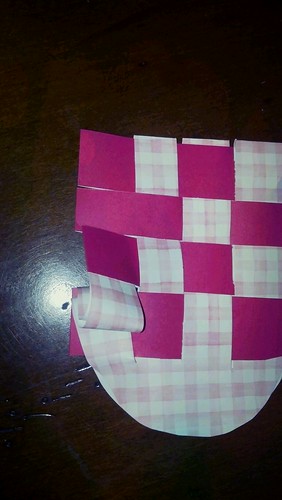
It's a little hard to do at first, but what I learned is that you shouldn't be afraid to bend the strips to get them weaved together.  They won't tear.  Also, do one strip at a time and keep pushing the weaved strips toward the curves.

Untitled


UntitledWhen you get them all weaved, pull a little outward on all sides.  This will keep it from looking like you have strips sticking out the sides of your heart.  If done correctly, you should be able to open the top and see the basket weave.

Untitled
hearts

Whatever kind of valentines your kids take to school, make it a fun and special day for them.

cindy

Thursday, June 21, 2012

Craft Room Reveal - Sewing Area

I've been showing off parts of my Craft Room over the past few weeks and today I want to show you the part that is near and dear to my heart.  It's the sewing area.


It's really one entire side of the room, across from the scrapbook area.  I love JoAnn's generally, but really regret two (expensive) purchases I have in my craft room.  First, this sewing table - almost $200.  It's small, and the drawers don't open well.  The other thing that is more frustrating (especially tonight) is the ribbon storage unit I bought.  It wasn't well made and I struggled with it until I finally gave up tonight.  (See my solution below).  I am happy with the painted pails that hold needles, bobbins, pins and buttons.


This is the corner next to the main sewing table.  It has my serger and some items I bought at a garage sale. I'm using the lanterns for supplies for headband making and elastic.


As of tonight it is also storing my ribbon after the epic fail of the ribbon holder.  I have some styrofoam balls recycled from Christmas ornaments that I used in another craft.  I took the dowel rods from the ribbon holder and sunk them vertically into the balls.  I put the ribbon on and lined them up on the table shelf.  (BTW, that little table was made by my dad in high school back in the 1940s.)


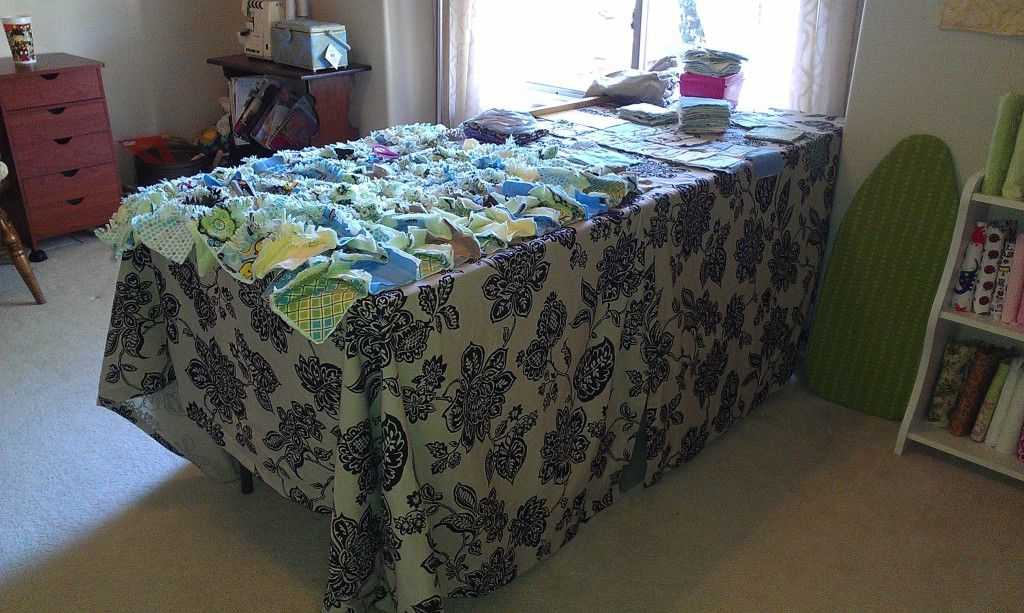
This is my cutting table.  I bought it at a Blockbuster that was closing for $30.  It's 6 feet long with a durable plastic top.  I covered it with two curtains I bought on sale at Target.  I covered it so I could use the area underneath for bin storage for scrap fabric and yarn.  It works really well with a plastic cutting mat on top of the fabric cover.


Last but not least is my fabric storage.  I described the shelf fabric storage in another post, but I've combined it with the shelves in my closet.  I've said it before, but I'll say it again - I have too much fabric and need to start using it before I buy anymore.


So, that's it!  It is my new favorite place - where my family knows I'm at when they can't find me.  Yep, I have everything but a bed in here.  Let the creativity begin in earnest!

cindy

Monday, June 11, 2012

Scrapbook Station

I've been so busy trying to finish a few projects before opening the Etsy store (Pretty Pretty Cindy), I haven't had time to post, but I'm excited about showing one of the best parts of the new craft room - the scrapbook station.

 I started with this armoire/computer station which I didn't want to move out of the room.  The first challenge was getting the corkboard to stick to the back of the cabinet. After a lot of fits and starts, I came up with VELCRO!

Next was finding a place for all my stamps.  This cabinet has a double pull out tray, one for the computer keyboard and the other a work area.  I used the computer keyboard tray, put on some non-stick/non-slip shelf liner and arranged the stamps in a small antique drawer in a way I can see them all.


Next, I had this old two-sided hanging thing for jewely. I turned it into a sticker/embellishment holder. Again, I can see everything and it's double sided!


I moved on to these plastic baskets I found at Goodwill and attached them to the corkboard with push pins -perfect for little items.


I used an old letter holder to keep bigger items.

I found these 4 glass candle holders at a garage sale and turned them into cute storage for ribbon and adhesives.


I bought a scrapbook/photo album and used it to keep all my letter stickers. You guessed it, I can see them all.  If you have a lot of letters, buy two books -mine is a little too full.


This was the one item I splurged on - a turning caddy. I bought it at Michaels, but I used a 50% off coupon to make the sticker shock go away.


I bought some pretty baskets at Michaels (on sale) and stored assorted items I want to keep out of sight.  An extra bonus is that the shelves are just a little deeper than the baskets, so when I pull out the basket, I can tilt it on the drawer so it stays accessible while I look through it.


Here's another item I am proud of.  I converted a shoe keeper we never used, took out a divider and it became instant paper storage!  I've heard that the best way to store paper is upright, but I'm not sure how to to that.  I did spend a tremendous amount of time sorting the paper by color.  You're looking at about 30 pounds (or more) of paper.  I need to give some away because I couldn't possibly use it all.


Well, that's it.  Here's the funny thing - although I have a good amount of scrapbooking stuff, I don't really get a chance to scrapbook much.  I've always worked out of travel containers on the dining room table.  My kids are 9 and 11, but in their scrapbooks they are 1 and 3.  I have more scrapbooking on my project list for June.  Now that I have an awesome place to work, maybe I'll get inspired.

cindy

Friday, June 8, 2012

Craft Room Reveal!

The day is finally here - my new craft room is DONE!!  I've been working in there and I love it.  Over the next couple of weeks, I'll show some detailed features of the new craft room, but in the meantime, here's some before, during and after pictures:
BEFORE

DURING

AFTER


I have too much fabric!

BEFORE

DURING

AFTER


My new cutting table where the couch (and mess) used to be.  There is storage under the table for scrap fabrics and extra yarn in bins.  The table cover is made from two curtain panels from Target.  The beer can collection is gone!


BEFORE

DURING

AFTER


Finally, a functional sewing area!  Now I don't have to drag my sewing projects into the dining room and keep them spread out for weeks at a time.  My favorite part of the room.

BEFORE

AFTER


I'm really proud of this part.  I've never had a place to scrapbook and now I have a scrapbook section of the room!  This was another big revelation - I have WAYYY too much paper!  I think I have enough for 20 scrapbooks, maybe more!

So there it is!  I'm so happy it's done, and frankly, so is my family.  It's my very own room for creativity.  Over the next couple weeks, I'll show all the sections of the room and how I organized them.

cindy