Showing posts with label babies. Show all posts

Wednesday, June 14, 2017

DIY Nursing Pillow


Looking for the perfect pillow to feed baby?  How about a little portable travel pillow or neck support on those long car rides?  If you ever wanted to make your own baby pillow, look no further than my new Etsy store, Pretty Home Threads, where I sell this full pattern as an immediate digital download.  This post will also redirect you to my Etsy store if you would like to purchase the pattern if you would rather make your own.


Materials Needed
 Cotton Fabric 
Soft Contrast Fabric 
Polyfill
Sewable Velcro 
Thread


The pattern is a PDF digital download with a full tutorial, including multiple photographs.  You need to know how to sew, and have a sewing machine. The skill level for the pattern is probably Intermediate, especially working with minky fabric.  


If you would like to use your own fabrics and sew a pillow, the pattern is available for immediate download.  You can purchase it for yourself HERE  


Whether it's for your baby or a gift for someone else, baby pillows are pretty AND practical.  

cindy


Wednesday, May 17, 2017

Pretty Pretty Cindy

I have an Etsy store - Pretty Pretty Cindy.  I love to make things for babies.  I make burp cloths and washcloths sets, bib sets, blankets, nursing pillows, Amish puzzleballs and Jingle Tag Balls.  I think handmade items are the best gifts for a baby.  Instead of telling you more about what I sell, I'll just show you:


There is much more to see in the Etsy store!  Check it out!

So, this is Pretty Pretty Cindy.  Pretty things for little people.

cindy


Thursday, July 25, 2013

Delicate Pastel Shells Afghan

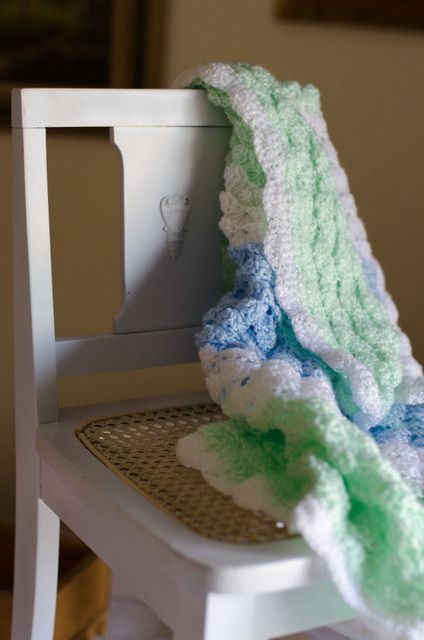
I've been working on clearing all the baby yarn I was given and having a lot of fun with it.  I'm pretty proud of this one.  It's really delicate and soft.


 I used 1 skein of Bernat Baby Coordinates in each color: white (Color A), pink (Color B) and mint green (Color C).  I used a size G hook and the pattern was a Catherine Wheel.  I'm pretty pleased with this one.  If you like this one, you can buy the finished product or an electronic version of this pattern in my Etsy store.  


Friday, November 23, 2012

Gift Ideas - Little Princesses

Have I said how much I love shopping Etsy?  It's officially Black Friday, so it's time to shop for Christmas.  Previously, I provided suggestions for men and women.  Today let's work on the little girl in your life.  These items are for girls under 5, but also include some baby items that may be suitable for baby showers.  Click the picture to my Pinterest "Etsy Finds" board and then click through directly to the item on Etsy.  Without further ado:

Vintage Rag Doll 


Source: etsy.com via Cindy on Pinterest


5 Piece Bedding Set
Source: etsy.com via Cindy on Pinterest


Mini Corker Hair Bows
Source: etsy.com via Cindy on Pinterest


Pink & Grey Chevron Wood Blocks
Source: etsy.com via Cindy on Pinterest


Lady Bug Tutu
Source: etsy.com via Cindy on Pinterest


Felt Play Wands
Source: etsy.com via Cindy on Pinterest


These are just a few of the adorable items you can find on Etsy.  (SHAMELESS PLUG ALERT) Don't forget to check out my store Pretty Pretty Cindy for some other inexpensive gift ideas.  I will keep posting in the upcoming days for baby/toddler boys, bigger little girls (6-11), little boys and teens.

Hope you had a Happy Thanksgiving - on with the Christmas shopping.  Tomorrow is Small Business Saturday, so patronize the fine businesses on Etsy.  Also, don't forget this Monday is Cyber Monday!  Visit your favorite on-line retailers for some great deals without leaving the comfort of your home (or desk).

cindy

Thursday, October 11, 2012

Softest Baby Afghan Ever!

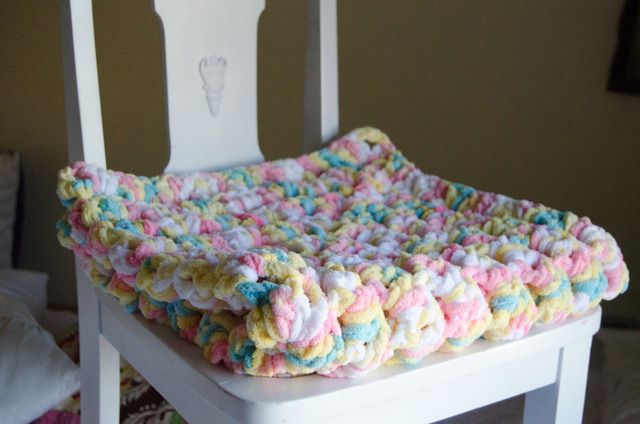
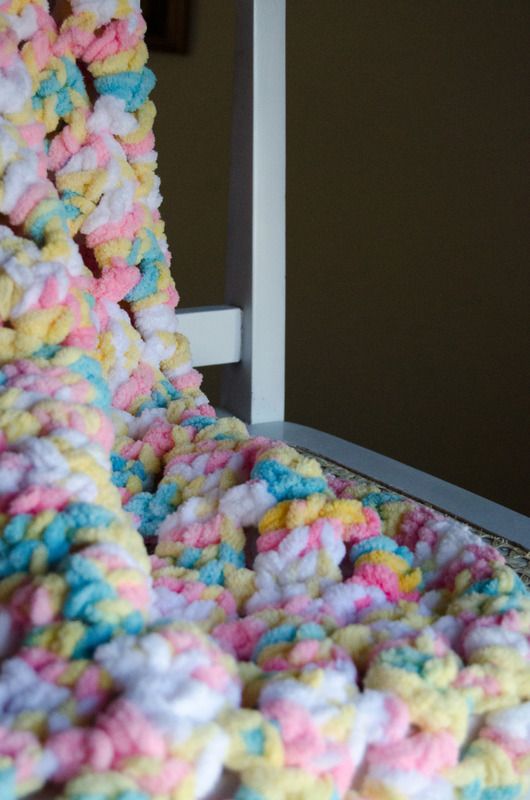
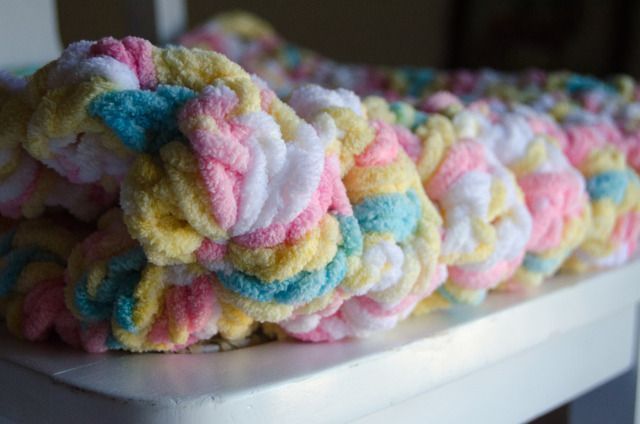
This is another one of those projects I needed to finish and I love this one so much I'm going to make another one just like it.  This is Bernat Baby Blanket yarn in "Pitter Patter," a multi-color yarn in white, pink, blue and yellow.  It is a super bulky yarn that feels just like chenille - but thicker.  I've never worked with a super bulky yarn, but it is worked with a size N crochet hook.


The result is a super soft, cushy afghan - perfect for a baby.  It's also easy to work with because the stitches are so big.  It also doesn't take long to make a blanket like this.  It measures about 32" square and is worked from the middle, which makes it easier with this type of yarn.


I made this one for my Etsy store, but it didn't take long before I had to give it away for a co-worker's baby shower.  She loved it, as did everyone else at the shower.  I still listed it on Etsy because it won't take long to make another.  The pattern is from Bernat, but you can find it here.


Aren't these pictures gorgeous??  They are from my very talented friend, Kate Eschbach, who blogs here.  She has been taking photos for a long time and does a great job on product shoots as well as portraits and landscapes.  Great news for folks in the Phoenix area - Kate is now available as a full time photographer!!  I'm so excited for her because this has been her dream for some time.  It is a wonderful thing when you can work doing what you love.  

Speaking of doing what you love - I loved working with this yarn and I'm on a roll with crochet right now.  More coming soon.

cindy


Friday, October 5, 2012

Tranquil Sea Baby Afghan

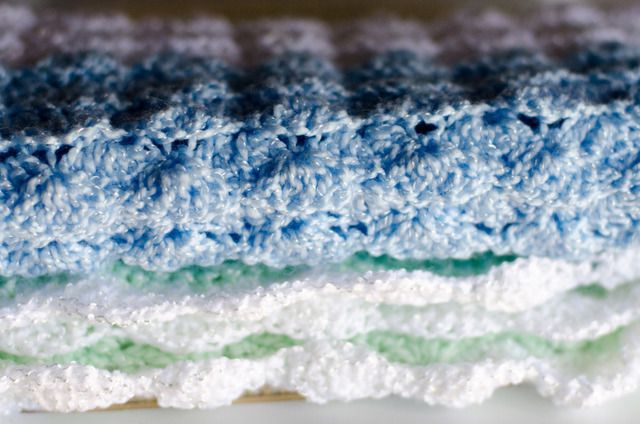
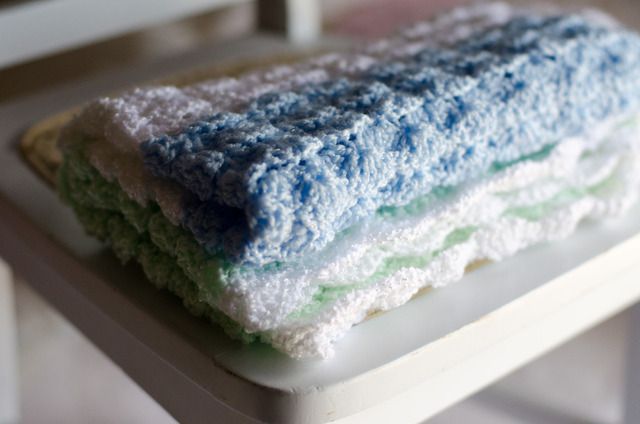
Finally - here's a project I finished!  I didn't make this for anyone in particular (which is why you can find it in my Etsy store - PrettyPrettyCindy).  The yarn was a bit difficult to work with because that baby yarn can be so thin.  But the shell pattern with the delicate look of baby yarn was beautiful.


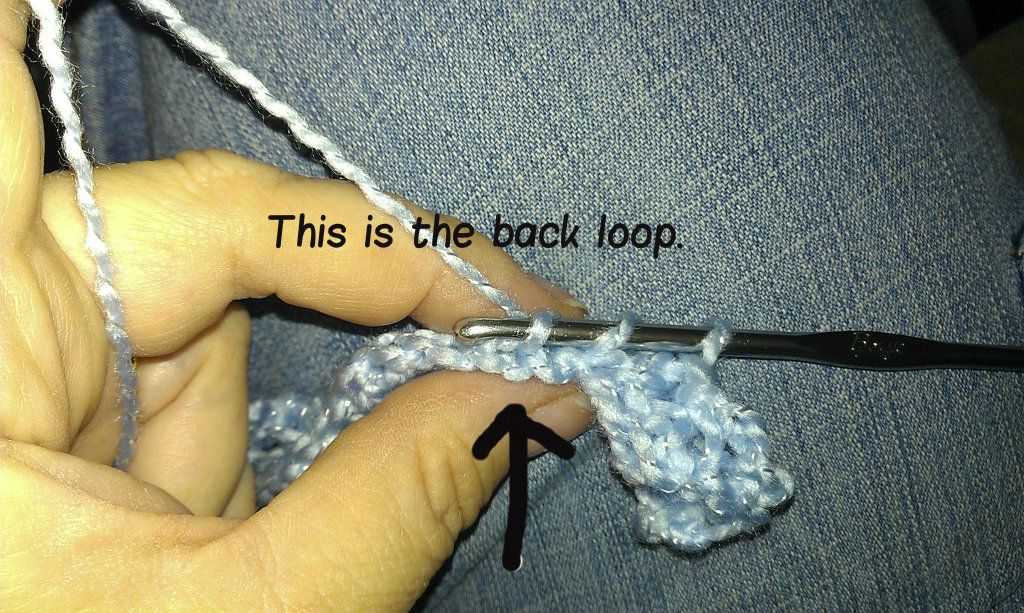
The best part of this afghan was a little trick I learned to give a regular shell pattern a three-dimensional look.  On each stitch, I inserted the hook into the back loop of the stitch below.  It looks a little like this:


O.K., it's hard to see in my picture, but I'm not great at taking a picture while holding fine yarn.  However, if you notice, the loop on the far right is the previous stitch and the one in the middle is yo over for the double crochet.  If you look at the stitch immediately to the left of the back loop, you will see that there are two loops on each stitch.  If you insert your hook into just the back loop instead of both loops (like you normally do), you get this three dimensional look.  It's also cool because that dimensional work appears on both sides of the afghan.


The other thing that was a little difficult was that the thin yarn appears to pull the stitches out of shape so they don't appear tight enough.  This is just amplified by using only the back loop.  But as you can see, it works just fine.


The other advice I would give working with this thin sport yarn is you really have to COUNT!  I hate counting stitches and many times when I'm making afghans, I just "eye" it so the sides line up.  But with fine lightweight yarn, that's nearly impossible.  I learned that the hard way when I had to rip out rows of stitches when I discovered I messed up many rows back.  Now wonder why it's been a while since I finished a project??

Anyway, I'm really proud of this one.  And, because I was given a lot of this baby yarn in white, pink, blue and green, I'll probably be making more baby afghans.

If you want the complete pattern for this afghan, you can find it here.

cindy

Saturday, June 23, 2012

Raggedy Rag Quilt

Do you really like rag quilts?  Love that look of raggedy edges?  This is the rag quilt for you.


I'm still using my favorite fabric (flannel) and I used another piece of flannel in the middle of the square "sandwich."  I used 5 inch square blocks and a 1" seam allowance on each side.  Yes, that means the end measurement of the block was 3" square.

 
It produces a dense, warm (heavy) quilt with lots of rags.  I'm not sure I would do a 1" seam allowance again, and if I did, I would definitely start with a minimum size of 6" square block.  This is still a very pretty quilt, but it takes a lot of squares to get to a crib or toddler bed size.  

One very cool trick I learned was the stitch I used to make the "X".  I used a "S" curve, which I bet is a stitch on almost every sewing machine.  By using the "S" I ended up with an effect on the smooth side of the quilt that I really love (and didn't anticipate).


My picture is not great, but each block matched curves and I didn't do anything special in using the "S" stitch.  Here's another view that might be a little better


I still like these rag quilts and can't wait to try more variations.  Next time I'll try some big squares.  My sewing machine will thank me.

If you are looking for more basic tutorials on rag quilts, check out my post here.  I also have some additional tips on making rag quilts here.

cindy

Tuesday, April 10, 2012

Chocolate Pistachio Rag Quilt

I took a break for Easter, but I made it back.  Here is my newest rag quilt.  I call it Chocolate Pistachio.


It's a square baby blanket - about 36" square.  I love the colors in green and brown with a little blue mixed in.  The fabric is flannel with a brown minky on the reverse side.  For the X on the squares I used a leaf decorative stitch, which looks really good on the minky.  I tried to use a contrasting color, but it just doesn't show up on the dark minky.  For the combination of minky and flannel I don't use a middle fabric layer, but if you want the blanket extra warm, you should.


I've struggled a little with keeping the squares lined up using a straight stitch.  On this quilt I changed to a zigzag to sew the squares together.  Much better!

I've been working on a number of projects I will be showing soon.  Stay tuned!

Sunday, December 11, 2011

Scrapbook Sunday

After spending time recently at the Phoenix Scrapbook Cottage, I realized how much I missed scrapbooking.  I tried to chronicle my kids, but am only up to the summer of 2003 (my daughter was born in 2003).  I have a lot to do.  I thought I would start Scrapbook Sundays as a way to inspire myself by looking at one layout I've done in the past.

For this first Scrapbook Sunday, I went back to 2001 right when I started scrapbooking.  My sister got me started with Making Memories materials.  I have always worked in 12x12, but in those days I worked directly on the white page.


Back then I liked to cut pictures in circles and ovals.  I like the side borders and use of a stencil to create an area to journal.  The little tiny marks on the page were put there by me.  I don't remember knowing about patterned paper then.


The stickers were big for me then too.


This is from my son's baby scrapbook and the idea was to show him what our life was like when he arrived.  Although I wouldn't want to show all the pages, I'm still pretty happy with some pages, both for content and appearance.


cindy

Thursday, November 10, 2011

Pinterest Challenge

I recently saw a blog where someone tried to replicate some of their pins from Pinterest.  It does make sense - isn't that why so many of us like Pinterest for DIY?  I want to take the challenge to make a few items that I've seen on Pinterest.  I'm not challenging myself to make them exactly as they appear in the pin, and I'm not setting a time limit.  (This is supposed to be a challenge, not a chore).  Here's the pins I want to do:
Source: etsy.com via Cindy on Pinterest

This button idea looks labor intensive, but might be cool in my office.


I don't have a baby, but I think this would be great to make for a group of unwed mothers.


I know mine definitely won't look like these, but I do have a pattern for a pincushion I want to try!


This would be great for a holiday meal!

OK, I think that's as many as I dare to take on!  Again, no promises as to when I will get this challenge going, but now that I've put myself out there, I have to try.  By the way, all of the pictures above go back to my Pinterest boards and ultimately back to the websites of origin.  I did not take any of these pictures and claim no attributes, but leave that with the original sources which you can see yourself.

Wish me luck!

cindy

Saturday, September 24, 2011

DIY - Rag Quilt

I've wanted to learn to quilt for a while, so when I found rag quilts I knew this was something I could teach myself.  Rag quilts are so soft and cuddly, especially when they are made from flannel.  The beauty of rag quilts is that the seam allowances are on the outside and you don't have to worry so much about the squares matching up perfectly.  The quilting part is easy too.
First, pick out your fabrics.  I'm going to give instructions based on flannel.  Flannel is not fleece.  Snuggle flannels are thin, fleece is that thick blanket stuff.  On traditional quilts, you usually have multi-design fabrics on one side and a single design/single fabric used on the other side.  You can do the single fabric design on one site, but on a rag quilt each square is quilted through as opposed to making a “quilt top” of multiple fabrics pieced together and quilting it to a single piece of fabric on the back.  In addition to your flannel fabrics, you need batting for the middle.  This is easy for a flannel rag quilt too, as you can use a thin muslin (or even another piece of flannel) instead of that white fluffy stuff.
I've seen debates online about whether to wash the flannel before you quilt.  I was taught to always wash fabrics before sewing and I have noticed that some flannels come with lots of sizing (think starch).  I wash mine first, but I'm sure it's not fatal whether you wash or not.

Cut your fabrics into squares.  I cut mine approximately 5” square.  That allows for 1” seam allowances on each side.  You can cut your muslin batting about 4" square, especially if you don't want the muslin fabric to show in your "rags".  Create a "sandwich" with three fabrics - the back, the batting and the top.


I think it's easier if you just assemble all of the "sandwiches" for your quilt all at once.  Now you're ready to quilt.  You are going to sew an X across each sandwich.  I recently saw a quilt where the quilter used one of the decorative stitches on her sewing machine.  She used the "leaf" stitch which is probably on even the most basic sewing machine.  Make sure you are using a heavier needle for this project, because as you start sewing the squares together, it can be tough on your machine if you aren't using a heavy needle by then.


Here's a great trick I picked up online.  As you are sewing one side of the X, take the opportunity to sew more than one square.  As you sew from corner to corner, have the next sandwich ready to pick up a corner as you finish the diagonal on the other.  This will make a "flag" or "banner" effect where your squares are linked together.  That way, you don't have to stop and cut the thread every time you sew a single square.


If you're using this "flag" technique to sew, you will do one half of the X on all the squares.  Cut the threads between the squares and repeat the process to stitch the other diagonal making the X.


Once all of your squares with Xs are made, you are ready to sew them together.  This is the fun part.  In rag quilting, the seam allowance is toward the "right" side of the fabric.  If you are using a single design of fabric on one side of your quilt, the seam allowance would go to the side with the multiple fabric designs.  Use a 5/8" or 1" seam allowance between the squares (the deeper the seam, the more "ragging" effect you will have).


See now why you need a heavy needle sewing these together?  You are sewing through six layers of flannel.  Watch for lint buildup in your sewing machine, as flannel does shed lots of lint.  Once you sew the squares together, sew a 1" seam all the way around the quilt.  Now it's time to "rag".  This is where I highly recommend you invest in a snipper.  It's not like scissors because it is spring loaded and very sharp on the point and blade.  You will thank me because ragging goes a lot quicker and your hands won't permanently cramp (although they will hurt).


Ragging is the kind of thing you want to do on the couch in front of the TV.  You just cut little slits into the seam allowance, being careful not to cut the seam itself.  The thinner you cut, the fuzzier it will be after washing.  Make sure to rag around the outside edges of the quilt too.  To get the rag effect, wash and wash.  The more it gets washed, the softer and fluffier it gets.  (Watch out for that lint in your washing machine).


There you have it!  You can make these quilts in "lovey" size, baby or even full size quilts.  They are easy and fun too!  I made a bunch for Christmas presents last year, so now's a great time to get started.  You can also join Craftsy in a project to collect 1000 blankets and hats for winter by making a few quilts for them.  Have a great time!


cindy


Saturday, September 17, 2011

Vaccines: We're in this Together

When he was five, my oldest brother spent a month in an iron lung in a hospital 45 minutes from my parents' home.  Have you ever seen an iron lung?


An iron lung is a negative pressure chamber that literally pushed air in and out of my brother's body.  Why?  Because the alternative was paralysis and maybe death from polio.  In the 1950s polio was the disease that made every mother terrified because it could strike without warning and spread like wildfire with no explanation or cure.  When the Salk vaccine was initially developed, my mom couldn't wait to get my then three year sister vaccinated.

When I was little, most kids suffered with measles, mumps, rubella and chicken pox.  In fact, there was a significant outbreak of rubella around the time I was born that resulted in an estimated 20,000 infants born with congenital rubella syndrome, with an additional 2,100 neonatal deaths and 11,250 miscarriages. Of the 20,000 infants born with congenital rubella syndrome, 11,600 were deaf, 3,580 were blind and 1,800 were mentally retarded.  Can you imagine how scared my mom was, especially when my brother contracted rubella when I was 6 weeks old?

People like me who had mumps, rubella and chicken pox as kids without complications were the lucky ones.  Adult men who get mumps frequently get testicular infections and adult women who contract chicken pox during pregnancy (because they weren't immunized or didn't have the disease) can have a child with birth defects.

So what's my point?  Vaccines have resulted in significant improvements in the quality of life throughout the world.  The risk of many significant and widespread diseases has all but disappeared.  In fact, we no longer vaccinate for smallpox because the disease has been eradicated.  Unfortunately there are many diseases that are virtually gone in the U.S. but still exist in the world:  polio, pertussis (whooping cough), diphtheria, chicken pox, mumps, measles, rubella and so many others.  These diseases are just an international flight away.

There is a movement to "exempt" children from routine childhood vaccines.  Here's the thing - if you choose not to vaccinate your child, I have no problem with you taking that risk with your child.  The problem is that there are others - people in my generation who don't have immunity because vaccines weren't available, infants who haven't been vaccinated, people with suppressed immune systems and more.  There have been specific examples of diseases returning when vaccinations were suspended - mumps on an Iowa college campus, pertussis in Sweden and the United Kingdom and various measles outbreaks.  Funny thing - of all of the arguments I've heard or read about the "risks" of vaccinations, I haven't seen one that disputes the fact that vaccines save hundreds of thousands of lives.  It's one thing to expose your children to diseases that may not be common today, but another to subject others to those diseases. Why do we want to bring back the fear our mothers and grandmothers experienced with their children?

Please - when you think about whether to vaccinate or not to vaccinate your child, please think about all of our children.

cindy