Showing posts with label blanket. Show all posts

Wednesday, May 17, 2017

Pretty Pretty Cindy

I have an Etsy store - Pretty Pretty Cindy.  I love to make things for babies.  I make burp cloths and washcloths sets, bib sets, blankets, nursing pillows, Amish puzzleballs and Jingle Tag Balls.  I think handmade items are the best gifts for a baby.  Instead of telling you more about what I sell, I'll just show you:


There is much more to see in the Etsy store!  Check it out!

So, this is Pretty Pretty Cindy.  Pretty things for little people.

cindy


Monday, November 14, 2016

My Favorite Yarn

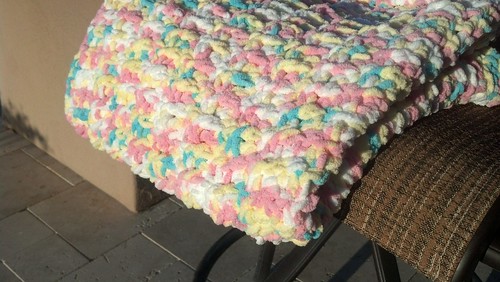
I love Bernat Baby Blanket yarn.  It is my favorite yarn - thick and soft like chenille.  I've made lots of baby blankets that I've given away or sold in my Etsy store.  (I have a few available right now ;)  It comes in lots of variegated colors for babies, and best of all, it now comes in grown up colors!  I could go on writing about it, but it's so much easier to show some of things I've made with this yarn:


I can't get enough of this yarn!

Cindy


Monday, May 25, 2015

Hey, My Etsy Store Is Back!

It's Spring (almost Summer) so that means my creativity came back.  I've also been very inspired by my friend's new baby, Mary Alice (heck, all things baby).  What's a girl to do? Make baby stuff to sell!

Pretty Pretty Cindy has some new stuff and I'm really excited.  I've been working on some really beautiful and functional burp cloths, gorgeous blankets and there's more to come.  I'm having such a good time, but now I need some CUSTOMERS!  Here's some of the new items you'll find right now at Pretty Pretty Cindy:

Here's some of those famous burp cloths (click on the picture or title for the Etsy listing):


Girl Pastel Daisy Block Crochet Afghan


There are more blankets and a few bibs too!  If you, or someone you know is having a baby, the things in my store make perfect gifts!  Soft, cuddly and pretty - that's the goal with every item.

I can't wait to make more stuff, so keep watching at Pretty Pretty Cindy

cindy


Thursday, October 31, 2013

Making Loveys

I've been in a blanket mood recently.  I wanted to try something I've seen online, but was a little nervous about trying it full size.  Solution?  Loveys!


A lovey (or blankie) is a small blanket perfect for babies and toddlers to sleep with, cuddle, drag around and refuse to let go in time for kindergarten.  I made these with cotton fabric on one side with minky on the other, all surrounded by a contrasting ruffle.

They were easy to make.  Decide on the size of lovey you want to make.  There is no uniform size for a lovey.  Mine are 18" x 21".  I wanted the lovey to fit a number of purposes - a doll or infant blanket, a small pet blanket or (mostly) a lovey to love.  I cut the two middle pieces 18 1/2" x 15" - one in cotton and one in minky.  


I wanted my ruffles to be about 2" wide finished, so I cut the contrasting fabric in two strips, each 5" wide x 36" long.  Those measurements assume 1/2" seams and 4" extra length for the ruffle.  


I hate taking pictures while I'm sewing, so while I describe the (easy) process, I'll intersperse the beautiful pictures taken by my friend Kate Eschbach (of Kate Eschbach Photography).


I began with the fun part - the ruffles.  I am estranged from my ruffler attachment and I did attempt a reconciliation for this project, but it just was not to be.  That left me with the old fashioned way.  First, sew the ends of the two strips together to form one long strip.  Fold in half and iron.


Using the longest stitch on your machine, sew long raw edges together with a 1/2" or less seam, leaving extra length of thread hanging after you cut it.  I would not recommend trying to ruffle the entire length at once - your thread will break (several times).  I only did about 12" or less at a time because I'm a ruffle weenie.  I also would go back after each section and sew the ruffles down with a normal length stitch instead of waiting until I ruffled the whole thing.  That doesn't leave a lot of room to adjust before you sew it to the main pieces, but as I said, I'm a ruffle weenie.


Once the long nightmare ruffle is done, take the 3 pieces - cotton rectangle, minky rectangle and long ruffle and make a sandwich lining up the edges - cotton rectangle, right side facing DOWN; ruffle with raw edge matching raw edges of the rectangles in the middle; and on the bottom, the minty with right side facing UP.  Sew a 1/2" (or deeper) seam, catching all three.  Sew all the way around the blanket. Be generous in gathering ruffles at the corners so you don't have to go tight around them.  Leave the last 4-5" on the side open so you can turn it inside out.


Turn the blanket inside out and hand-sew the remaining opening closed.  After I turned the blanket right side out, I went back and removes some of the visible extra threads on the finished product from the places where I initially sewed the ruffles.


And there you have it - easy, right?  (If this looks a little different than the other pictures, this is a second lovey I made.)  You can find both of these lovies for sale in my Etsy store, Pretty Pretty Cindy

You can't have too many loveys.

Thursday, June 27, 2013

Stash Buster Challenge - Thick & Cuddly Baby Blanket

In April I joined the Stash Buster Challenge to get rid of a stash of baby yarn I have.  


If you read Straddling the Gap you also know I absolutely love Bernat Baby Blanket yarn.  Evidently others do too, because it has been popular in my Etsy store.  A little while back I started using a new pattern with my favorite yarn.  I'm not sure what to call the pattern, but it does make a thicker (and thus more cuddly) weave, so I'm going with the name "Thick and Cuddly Baby Blanket."  (Note - if you have a stash that includes the old version of Bernat Baby Blanket yarn - it won't be very thick or feel like chenille - you need the newer version that does.)


It's one of the easiest stitches to do.  I used a size N hook, but depending on how tight you want to make the weave, you can use as small as a K.  I used 1 1/2 skeins of 10.5 ounce size.  (Yes, this is a pig on yarn, so plan accordingly).  To make a blanket about 33" inches square, you start off with chain 53.  (It's 2 + 1 regardless of the size you want.)  Row 1:  Make a double crochet in the third hook from the last chain and double crochet all the way across.  Chain two.  Row 2:  Make a single crochet on the second chain from the hook.  Yo and run the hook behind the post immediately below, yo where your hook comes out on the left side of the post and pull back up.


You will now have three chains on the hook - just like a regular double crochet.  Yo and pull through two chains and then yo again to pull through the remaining two chains.  Then continue in that pattern - single crochet and double crochet behind the post below.  It will look something like this (this picture shows the stitch a bit sideways):


Continue across Row 2.  You should end with a single crochet.  Chain 3.
Row 3 is another row of double crochet.  Chain 2.  Continue with Rows 2 and 3 until you get the desired length.  Make sure you keep those special posts lined up with the ones below.  That's probably the hardest part, but generally this is a very easy blanket to make.  The look of this is great because one side has these ridged posts and the other has almost a basket weave look.

If you want to do a single crochet border, that's great, or any other border you would like.  I wouldn't get too fancy because this is very thick yarn and by this point you've probably used more yarn that you would like.  However, you will love the results - a thick and very soft blanket.  I hope you love it as much as I do!

blanket 2

cindy