Showing posts with label scarf. Show all posts

Wednesday, January 23, 2013

Fun Fur Scarf

O.K., this is getting to be the longest "Scarf Week" ever.  Finally, I have another scarf to show you.


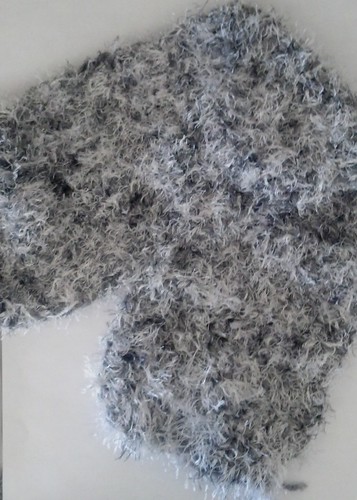
Fun fur scarf
This is a fairly easy scarf to make, especially if you already know how to crochet.  I made this with Red Heart Super Saver in gray and Moda Dea Espress (fun fur) in a variegated gray/black/white.  I used a size I hook and about 1 skein of each yarn for this scarf.

In crocheting this scarf, you will use both strands of yarn simultaneously.  It can take a while to work, mostly because the fun fur can be tricky.  But the effect looks very fancy and the level of crochet technique is pretty easy.

This scarf was made in rows of 14 triple crochet.  The initial chain should be 17 loops and after turning, the first triple crochet will be in the third chain.  There is no gauge (my favorite), but you do have to count.  Using both yarns makes it easy to miss stitches.  Make the scarf as long or wide as you want - no right or wrong.

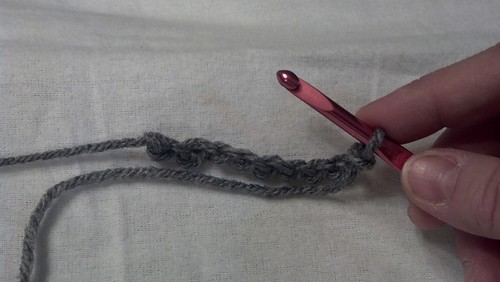
Because this is such an easy scarf to make, here is how to make a triple crochet.  The pictures below show the gray yarn without the fun fur because it's easier to see.


Untitled

Chain the number of loops you want + 3.

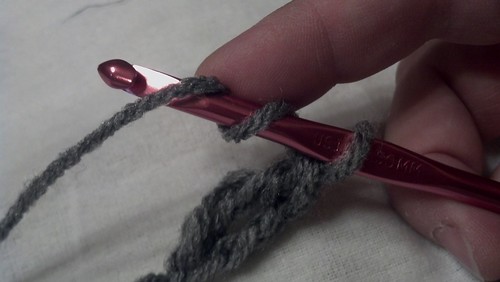
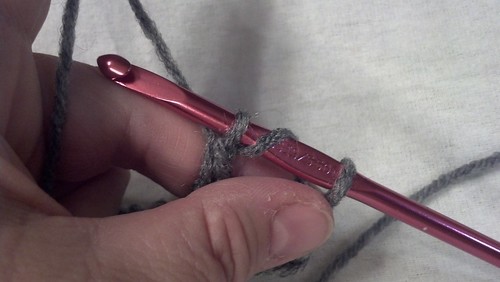
Yarn over twice and insert hook through third chain.


Untitled

Untitled

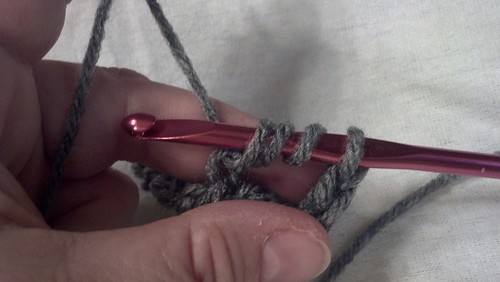
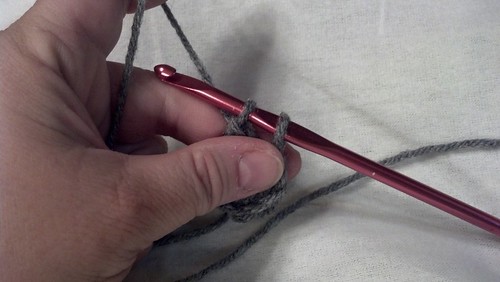
You should now have four loops on the hook.  Yarn over and pull through two loops.  You will now have three loops on the chain.

Untitled

Yarn over and pull through two loops.  You will now have two loops left on the hook.


Untitled

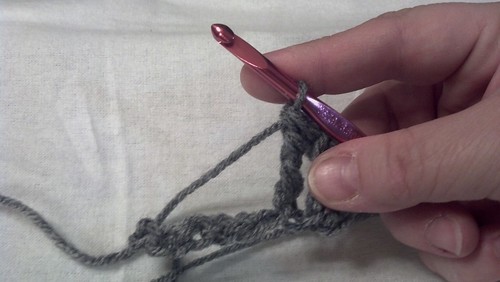
Yarn over and pull through the remaining two loops.  A triple crochet looks like this:


crochet3

I've been wearing a scarf like this for over two years and it holds up really well.  You'll get lots of nice comments, especially because it looks so fancy.  You can change the weight of the scarf by using a lighter weight yarn, so the scarf works even in the spring.  Whether you are making one of these scarves for yourself or for someone else, you'll love how these look.

cindy

Thursday, January 10, 2013

Scarf Week - Ruffle Scarf

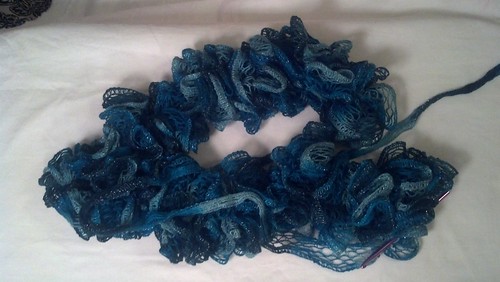
Today we're going to tackle a ruffle scarf.  These are so pretty and very popular right now.  Here's a little known secret - they are soooo easy to make.  You don't have to know much about crochet - it's just chains.  Here's what your finished product will look like (without the strand off the side).


sashay10

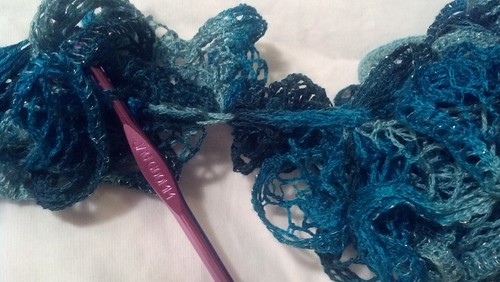
For this scarf I used Red Heart Boutique Sashay in the color Jive.  Red Heart has 22 ombre and multi-color versions of Sashay.  It has a fishnet look.  You can use a crochet hook J through L (your choice). You will find in this tutorial that there are very few rules about using Sashay because it's hard to make a mistake.

sashay2

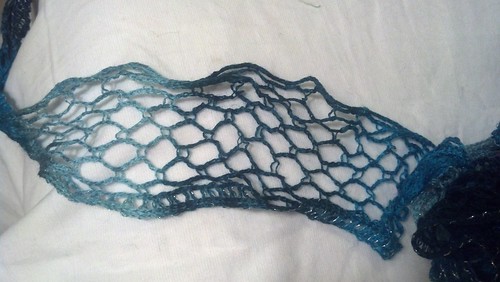
To start, you need to spread the yarn (I can't think of another word) out so you can see the netting.  Notice at the bottom there is a tighter weave that looks like a ladder?  That is the bottom and you will NOT crochet through it.  You can also notice that it has some metallic threads in that part.

Next, you can tie a knot in the end to begin.  Get it nice and tight.  Put your hook through a part of the knot and begin chaining.  Use the very top holes along the opposite side of the "ladder" and skip every other hole.  Just chain, and always go from front to back.  It will feel like you are making yarn over (YO) every time.  For purposes of this tutorial I will use the word "chain" instead of YO.


sashay


sashay9

For my scarf I chain 15 loops on the hook, skipping every other hole on the very top.  That should leave you with 15 loops on your hook, like this:
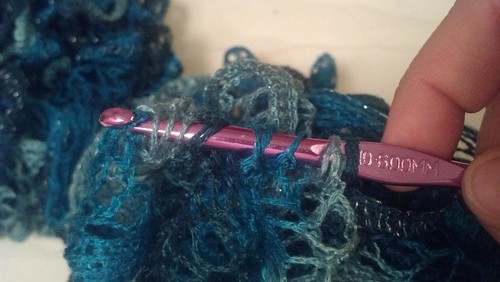
sashay6

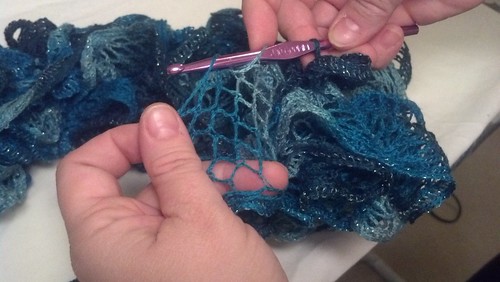
If you have a few more or a few less loops, it's no big deal.  It's actually your preference, but the more loops, the longer/deeper your ruffles will be.  Once you get the 15 loops on the hook, pull the last loop hooked back through the other loops.  This can be tricky with this yarn, so I suggest the "cheating" method.  Instead of trying to pull the loop back through the others, just hold the hook straight and use your fingers to move the other loops over the last loop.  Whatever works for you is fine.

The next part is the only step I think you must do.  After pulling the single loop back through the others, secure it by using the next loop on the yarn and slip stitch it back through the one loop left on your hook.  This will keep your scarf from quickly unraveling if you drop the next loops.

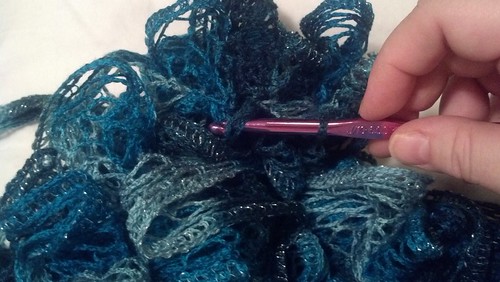
For the next set of loops I like to use the loops that are just under the top loop.  This provides a little more support to the scarf.  When you hook these loops it will look like two strands on the hook.  Do 10 of these and pull the last loop on the hook back through the others.  Finally, repeat the first step - 15 loops using the top loop of the yarn.  So here's where we are so far:

Tie the end
Push your hook through the tied end
Chain 15 of the top loop and pull the last loop back through the others.
Secure with a slip stitch
Chain 10 of the loops just under the top loop of the yarn and pull the last look back through.
Secure with a slip stitch
Chain 15 of the top loop and pull the last loop back through the others.
Secure with a slip stitch.

After repeating this sequence a couple of times, you can look back at your scarf and see this:

sashay4

Decision time.  If you don't mind the fullness of the ruffles like this, or want a lighter weight scarf, keep repeating the steps above.  With that method you should be able to make a complete scarf with 1 skein of Sashay.  However, I wanted a heavier, more substantial scarf this time, so I added the following step.   With the single loop on your hook go back about halfway down this line of chains you already did and slip stitch through one of the tighter loops.  In the picture above, it would be about dead center.  There is no specific part of the chain to do this in, so don't worry about finding the right loop.  If you choose this method, it will look like this:


sashay3

Continue on, repeating all the chains above (and going back to slip stitch if you would like).  When you get to your desired length, cut the yarn and make a knot by pulling the remaining yarn through the last loop in a slip stitch.  Tie another knot, cut off the excess and voila!  You're done!!

Once you get the hang of these, you can whip them out in an hour or two.  Great gifts and accessories for your wardrobe.

Come back next time (which should be tomorrow God and technology willing) and see a totally different kind of scarf made from fabric!  In fact, it's an upcycle project, which is my new favorite method of sewing/crafting for 2013.

cindy

Wednesday, January 9, 2013

Catherine Wheel Crochet Scarf

Welcome to Scarf Week!  For those of you who regularly read my blog, I tend to write very late in the evening, Mountain Standard Time.  That means that my posts may appear to be every other day.  Don't worry though, there will be at least 5 different scarfs during Scarf Week.  On to our first scarf!


A Catherine Wheel stitch is a great crochet stitch which makes a beginner crocheter an intermediate crocheter (which is where I think I'm firmly planted).  It also makes an amazing scarf and pretty much anything else you want to crochet.  I first used this stitch in an afghan with triple crochet stitches.  This scarf uses double crochet stitches which seems to fit the scale of a scarf better.

You can make this scarf as wide and long as you want.  Mine was 10" wide and 45" long.  I used a H size hook, but you can use a smaller hook if you want a scarf with smaller stitches (so the width will be slightly less).  As you can guess, there is no gauge, which is the way I like to do most of my projects.  You can use any kind of yarn; for this scarf I used a worsted weight yarn.  This scarf looks good in a single color, variegated yarn or two colors (see my Catherine Wheel Afghan for the look of two colors).

Monday, January 7, 2013

It's Scarf Week!

Although I love in Arizona, we still think it's cold here (about 44 in the morning), so we still wear scarves. I also grew up in the Midwest, so I know it's actually COLD there.  Whether you need one to keep warm or just like them a fashion statements, scarves are cool.

This week I'm going to show you some ways to make your own scarves. Most will be crochet, but a few will be sewing. And, one will be no-sew, so it doesn't matter what your skill level is.  We all need to stay warm and look good doing it! Here's another idea: even if you are warm, there are folks who live on the street who aren't that warm. Please consider making an extra scarf for them. If you need help finding somewhere to send these, please let me know and I will get you the information.

Get your favorite yarns (including some of the specialty yarns), some fleece and sheer fabric and we'll get going tomorrow.

Ready to warm up?

cindy