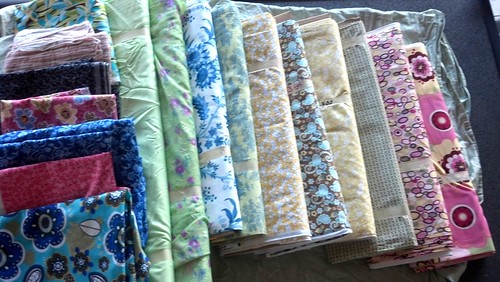
Knowing how to sew means you can create those little items you can use everyday out of fabric you like and in sizes that work best for you. Here is another one of those little items that I learned to make and now I can whip one up in a half hour or so (which is great if you lose water bottles like I do). This same idea can work with a lot of sizes of bottles and have shorter straps for kids. This bottle carrier will hold many standard size manufactured bottles, but if you want one to fit a specific bottle, you can alter the pattern by using the circumference of the bottom of the bottle and its height as a guide. Here is the pattern I used to make mine. I borrowed heavily from this pattern from ilovefabric.com.
You need:
2 pieces of fabric 12" x 10.5" (I use home decorating fabric.)
1 piece of batting 10.5" x 9.5"
2 fabric circles 4" in diameter
1 batting circle 3" in diameter
1 strip of fabric 3.5" x 50" for adult size strap (Use 42" long for child)
The 2 main pieces of fabric can be the same design or if you want to have a coordinating fabric as a liner, you can use 2 different fabric designs (which is what I did on this bottle carrier).

As a cheat, you can use a roll of duct tape or other circle to get that circle pattern.

You can use twill tape or heavy ribbon for the strap. I chose to use the coordinating fabric because I think the straps hold up better. If your strap fabric isn't 50" long, don't worry - here's how to piece strips. Take two pieces of fabric and lay them perpendicular with right sides together. Sew a line diagonal across the area where the pieces intersect and then cut the selvage.

Taking your new 50" strip, sew the ends under and then fold the long side in half, right sides of fabric facing each other. Sew a seam with a 1/4" seam allowance from end to end, leaving the ends open on either end of the strap.

Using a safety pin attached to one end of the strap as a guide, turn the inside of the strap out so the right side of the fabric is showing. Iron the seam. At this point you can topstitch the lengths of the strap if you wish. That gives the strap a flat look.

Using a safety pin attached to one end of the strap as a guide, turn the inside of the strap out so the right side of the fabric is showing. Iron the seam. At this point you can topstitch the lengths of the strap if you wish. That gives the strap a flat look.
Next, lay the 2 main fabric pieces, right sides together and sew a 5/8" seam along the top (one of the 12" sides). Iron the seam open. (This would have been an ideal place to sew the strap onto the main fabric by placing either end of the strap between the outer and lining fabrics with about 1-2" of strap sticking out when you put the outer and lining fabrics right sides together. The ends of the straps should be about 2" from either side of the fabrics. You would then sew the ends of the straps to the wrong side of the liner fabric. I didn't so it that way, so I'll continue with instructions for the straps sewn on top of the liner fabric.)

Pin the batting to the wrong side of the outer fabric. This will hold it temporarily as you get started on quilting. If you didn't already sew the straps onto the fabric, sew them onto the right side of the lining fabric, about 1-2" from the edges. Be sure you are only sewing onto the lining fabric so the seams don't show through on the outer fabric.

Fold the lining fabric over the batting so the right side of the liner fabric is showing. Topstitch along the top, right next to the seam you sewed to join the outer and inner fabrics.


Fold the lining fabric over the batting so the right side of the liner fabric is showing. Topstitch along the top, right next to the seam you sewed to join the outer and inner fabrics.

Starting at the topstitch line, sew straight lines (about 1.5" apart) to the open bottom so the batting is evenly quilted. Don't worry if you are sewing over the portions of the strap that are already sewn on. I wish I knew the name of the tool, but see the metal doohickey in the picture to the right of the presser foot? It has a bar that attaches to the machine and acts as a guide for sewing straight lines equidistant from each other. You can also draw lines using a fabric marking pen (ink disappears). Once you finish, if your batting is sticking out at the bottom, trim it back and sew the bottom closed. (Don't worry that the wrong sides are together and the seam shows.)


Take the circle pieces, right sides together, and sew around the circumference, leaving a 2" opening. Turn inside out:

Gently insert the circle batting into the opening. Hand sew the opening closed and then sew the circle with seams like a pie - 4 seams in all.


Gently insert the circle batting into the opening. Hand sew the opening closed and then sew the circle with seams like a pie - 4 seams in all.

Take the main bottle piece and fold it in half WRONG sides together. You will use a French seam to make the circular shape, and that is a two-step process. First sew a narrow (1/4") seam along the raw edges to join the sides.

Now turn the tube inside out and sew another seam on the same edge, this time using a 5/8" seam allowance. That will have the effect of "capturing" the first seam in a way that looks really clean.

Now you're ready for the hardest part - sewing the circular bottom on the open end of the tube. Carefully pin the circle onto the bottom of the inside-out tube (striped side in the pictures). Slowly sew it onto the bottom of the tube. You can also hand sew it on if that is easier for you.


Now turn the tube inside out and sew another seam on the same edge, this time using a 5/8" seam allowance. That will have the effect of "capturing" the first seam in a way that looks really clean.

Now you're ready for the hardest part - sewing the circular bottom on the open end of the tube. Carefully pin the circle onto the bottom of the inside-out tube (striped side in the pictures). Slowly sew it onto the bottom of the tube. You can also hand sew it on if that is easier for you.

This is what it looks like when it's done. It's not pretty, but it's the inside of the bottle carrier.

Turn your bottle carrier inside out and you're done!

cindy

Turn your bottle carrier inside out and you're done!

cindy