Monday, April 14, 2014

Easter Bunny Place Cards


Looking to incorporate your creativity into your Easter table?  I made these place cards several years ago for Easter and I still think they are so cute.  I think I found this idea in Family Fun magazine.  They are a great example of paper piecing:


These are not too hard to make, although they take a bit of time.  Hopefully, you are not having too many people to Easter dinner - I had 12 that year :)

You need scrapbook paper in two solid colors, one in a patterned color and some white for Mr. Bunny.  You also need vellum paper, brads, a little ribbon and some 3-dimensional adhesives - like sticky foam squares.


Because I made these several years ago, for this tutorial I used slightly different colors.  First cut your card (background paper) into 3"x 5 1/2" rectangles and fold in half.  If you have a scoring tool, this will make your fold cleaner.


Next, cut your front square in a contrasting color.  Mr. Bunny will sit on this square.  I used pastel green because it matched my china pattern.  Cut the squares 2 1/2"square.


Next cut the patterned paper in a rectangle about 2 1/2" x 1".  This will be the background for your vellum name.  I used a pink gingham, but you can use any pattern.  

Now comes the part that many might find intimidating but it's pretty easy.  Take the white paper and draw a head (like a fat pear), two ears and two fat feet (look like elongated circles).  You might want to start by drawing them, but once you feel comfortable, you can probably cut them without patterns.  Remember, each Mr. Bunny is unique.


Next, draw two big dot eyes close together, a long skinny pink nose, a little line below the nose and whiskers on the face.  You also need to draw paw marks.


Using your computer's printer, pick a fun font and print the names of your guests on an 8 1/2 x 11 piece of vellum.  A thicker, paper weight vellum does great in a printer.  Once you print all the names, cut them in rectangles just a little smaller than the patterned paper.  Get some tiny ribbon and tie little bows.  Add a little hot glue drop if you are nervous about the bows coming apart.  Now you are ready to piece.

Start with the background paper and glue the square onto the front half.  Piece each piece of Mr. Bunny on top of the paper, with the head on top of the ears and feet which are glued first to the paper.  You may want to use a 3 dimensional adhesive to make Mr. Bunny pop (or in his case, hop).  You will want his feet to slightly overlap the patterned paper and his ears to stick up above the fold.  A pair of tweezers will help immensely.


Now you want to layer the patterned paper (in purple above) over the green and then the vellum with the name over the patterned paper.  You are going to hold them together with metal brads.  (Here's a bonus tutorial on how to apply a brad.)  A brad is a small piece of metal you drive through your paper to attach papers in a decorative way, or, in this case, attach a piece of vellum.  It's very hard to glue vellum without it showing.  I also like brads because they come in a variety of colors.  On my sample I used a pastel green brad, but here I'll show metal brads.


That silver cylinder thing is a brad tool.  Notice that the end is not flat, but has a tiny point that you insert in the brad to hammer it.  I like this tool set from Making Memories.


Put the brad, smaller side down, over the papers you want to hold together.  In this case I'm driving the brad through 4 layers - the vellum, the pattern contrast paper, the square for Mr. Bunny and the top of the place card.  Use a hammer (see the one above) to pound the brad tool down, driving the brad through the papers.  PLEASE make sure to use a hard surface - the harder the better (granite countertops, tile floors, heavy wood furniture) - AND a self healing mat (or plastic cutting board in a pinch) under the papers.  If you don't, you WILL have a mark in your surface underneath the papers.  Once you hammer the brad through the papers and turn over the papers, it should look like this.


Take the same brad tool and insert it over this side of the brad and pound it down.  It will force the brad shaft to spread, "grabbing" the paper.


You've done it!


Your guests will be so impressed at your craftiness and that you cared enough to make beautiful place cards.  Depending on the colors you pick with your dinnerware and tablecloth, they can also make an attractive addition to your table.


Happy Easter!

cindy

Wednesday, April 9, 2014

Peeps Easter Cake

If you look on Pinterest, you will see lots of Easter crafts, and finally, yes FINALLY, I am starting to get that crafting mojo back.  Not original crafts, mind you, but crafts!  I'm in the Easter mood so I'm going to be featuring some old and new projects I have done for Easter.  This one is from last year and I was SOOO proud of it.


It may not look so great to the serious cake decorator (just check some of the stuff on Pinterest), but it made my Easter guests smile.  Here's how easy it was:

I made 2 chocolate cake mixes and used 9" round pans.  (You can use whatever flavor of cake you want.)  Instead of filling up the pans with the batter, I only filled them about half way so the layers would be thinner.  You can also slice an already baked round (make sure to freeze it first), but I liked this way better.  Just make sure to watch the baking time - it won't take as long so don't burn your cake.  After your cake layers cool a bit, freeze them (or at least make them very cold).  I can't believe it took me so long in life to realize that a frozen cake is much easier to frost.  Duh!

Next, I used some white or cream cheese frosting and split 2-3 tubs into four glass bowls.  I like to have too much frosting instead of too little, so I used three tubs.  One I separated the icing into the bowls, I started experimenting with color.  I used food coloring.  If you are not used to dabbling in food coloring, I would suggest you read the package to get an idea of the ratios of the respective colors.  However, be very careful in following the box instructions for how much dye to use for icing - they really tend to overdo the number of drops needed!  Keep the same ratio of color to color, just don't use as much.  It's no fun to have your guests sitting there with dyed lips and tongues - yuck!

I managed to get pink, yellow, purple and blue with my dyes.  From there it was pretty easy.  I iced each layer with a different color, including between the layers.  Once my little rainbow was finished, I lined the outside with Peeps.  If you have trouble getting them to stay, use a little more frosting on the Peep.  I finished it off with robin's eggs, M&Ms and any other candy in pastel colors.  I ran out of time, but I wanted to dye a little coconut green (use only a drop of food coloring and mix with coconut in a Ziploc bag) to make some grass for my eggs.

If you don't like all the color on the outside of the cake, you can do the same thing inside the cake by coloring the batter - you just need to use white cake.  

So colorful, so springtime and so much fun!


Happy Easter!

cindy

Tuesday, April 8, 2014

It's Almost Here . . .


Seen last year . . .

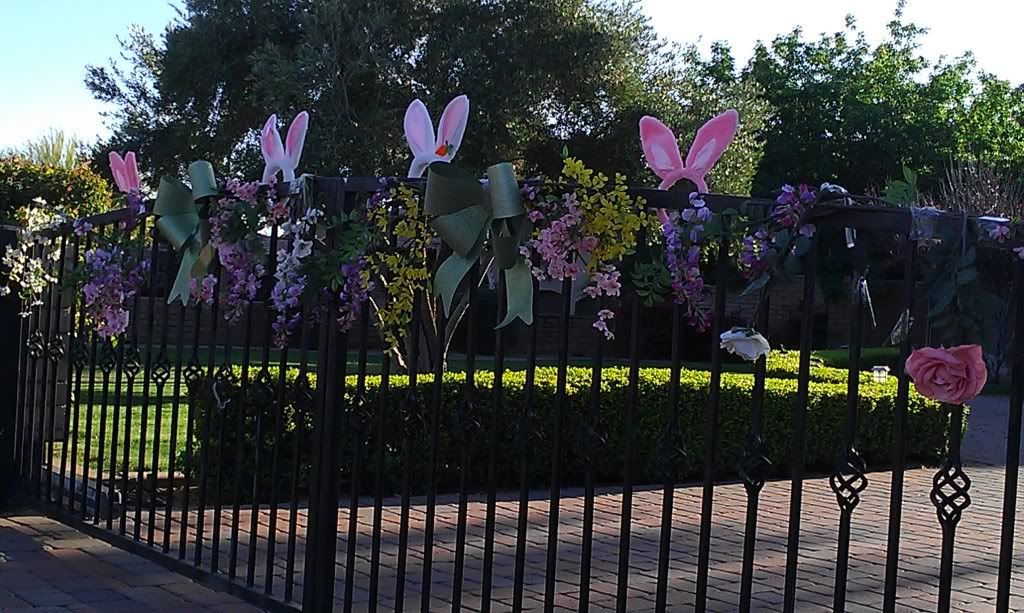
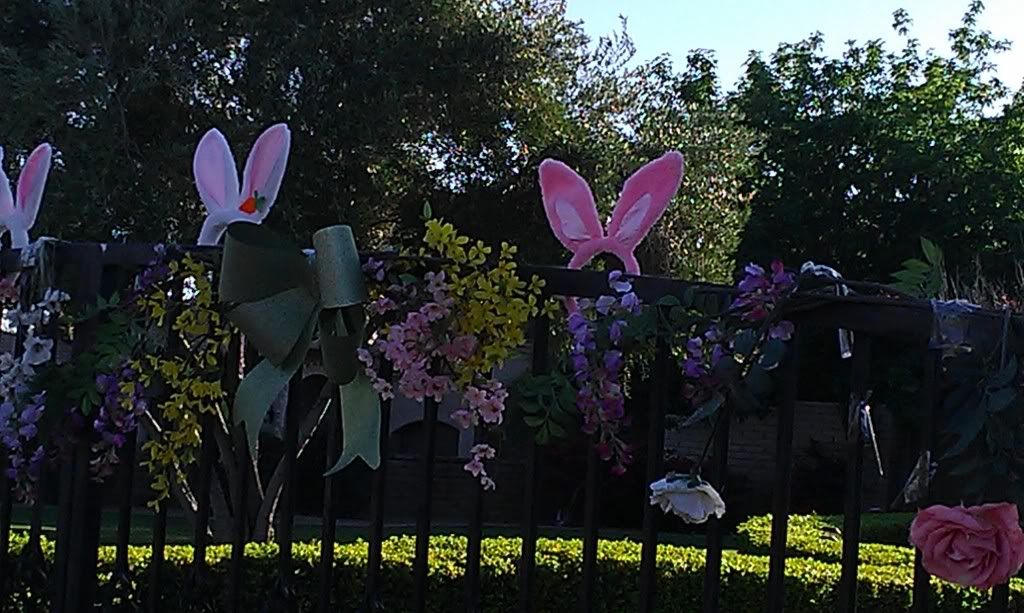
I can't claim credit for this, but I did see it down the street and I think it's adorable:


Yes, those are bunny ears on headbands!  It is such a great idea.  There are also fake flowers (cheap plastic ones are very appropriate for this open air display).  Finally, the bows are also plastic.  This would be great on a fence or iron door.  Heck, it would be cute on a wreath.  Anywhere you can hide the headband part - it looks just like bunnies sticking their ears up.


Hippity, hoppity, Easter's on its way!

cindy

Wednesday, April 2, 2014

Colonial Day Redux

A couple of years ago I wrote a post about making a Colonial Day costume for my son.  I was very proud of what I was able to do in two hours working with Goodwill items.  This has also been one of my most popular posts.  Evidently I'm not the only mom who needed to make a Colonial Day costume for a boy, mostly at the last minute.


This year it was time for my daughter to do Colonial Day.  I thought about being a good sewer and making a beautiful dress, but naahh.  She wanted a store bought costume.  I was skeptical at the type of costume we could get in the spring, but we went to Easley"s Costumes in Phoenix and found this:


Isn't that just the cutest?  I really thought we wouldn't be able to afford buying a costume and considered renting one.  However, it was just the opposite!  This beauty was only $25!

So, where's the crafty, clever information you were searching for?  It's not very crafty, but sometimes the most clever thing to do is to look for costumes in the most obvious places!  Costume stores are also obvious places to look for Halloween, and much better quality and selection than department stores.

Happy Colonial Day!

cindy